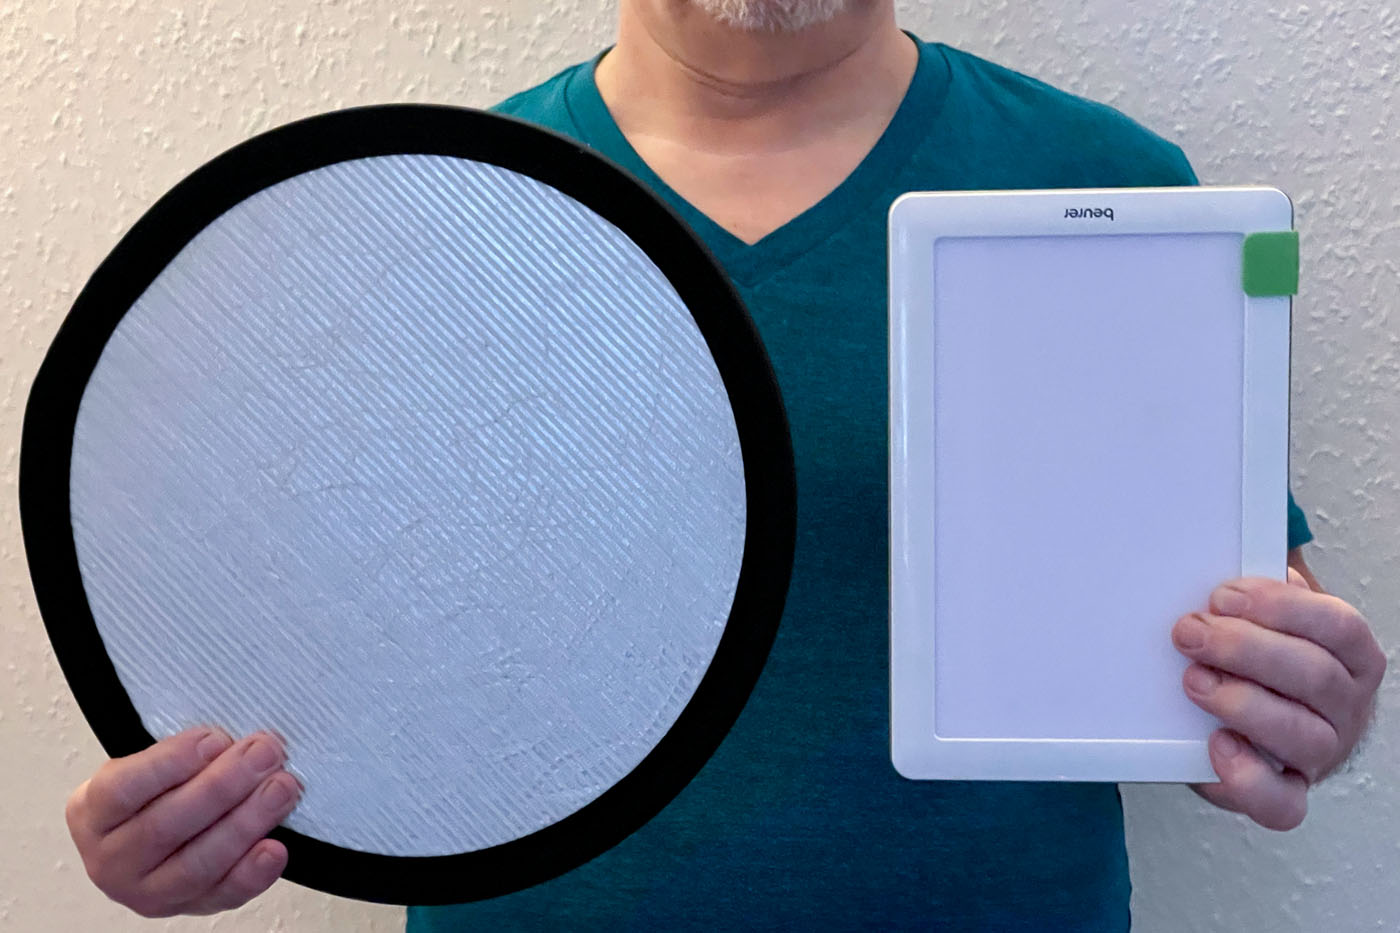
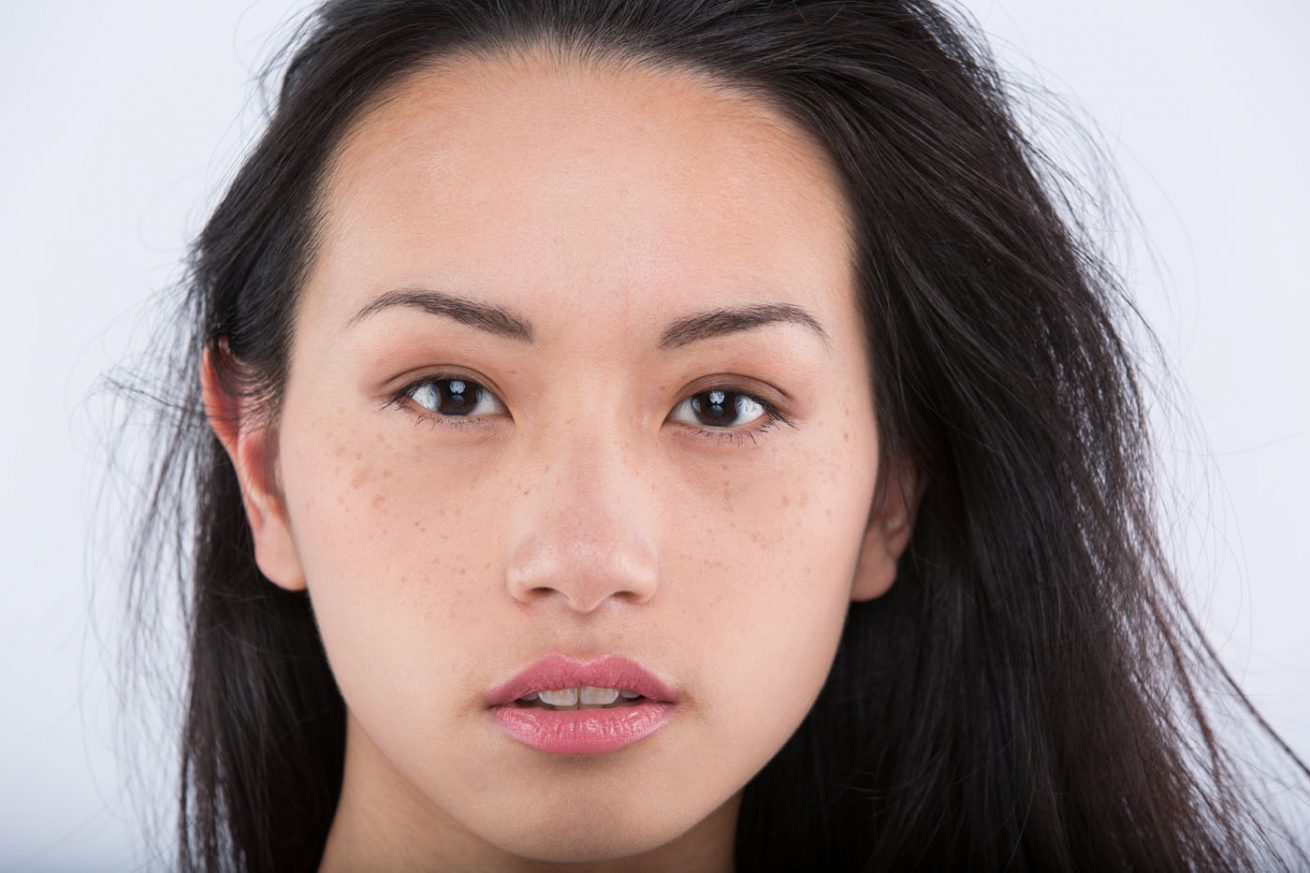
In this tutorial, I am going to demonstrate a wide range of portrait lighting styles that can be achieved with a bare minimum of equipment. In this case, the equipment consisted of a small, flat-panel, S.A.D. lamp and a 10" mini-reflector. No other equipment was used and no post-production was carried out.
Anyone new to studio lighting may be a little overwhelmed by the array of lighting styles and their unique names. However, by minimising the equipment I have attempted to demystify the process and pull together a simplistic description of each, along with a panel of sample images, and guidance on how each effect can be achieved.
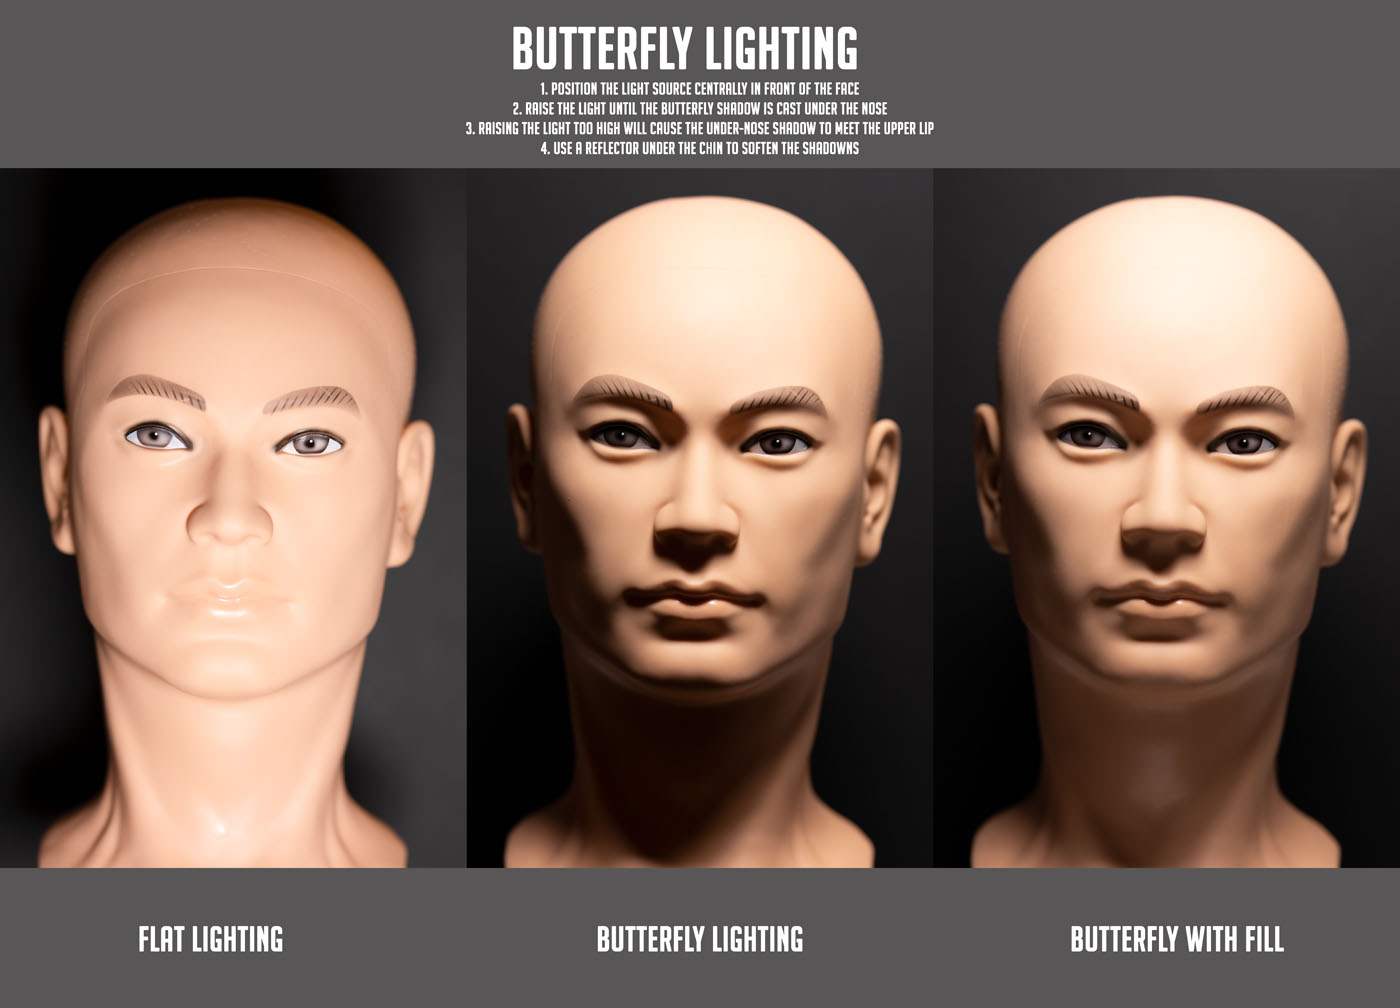
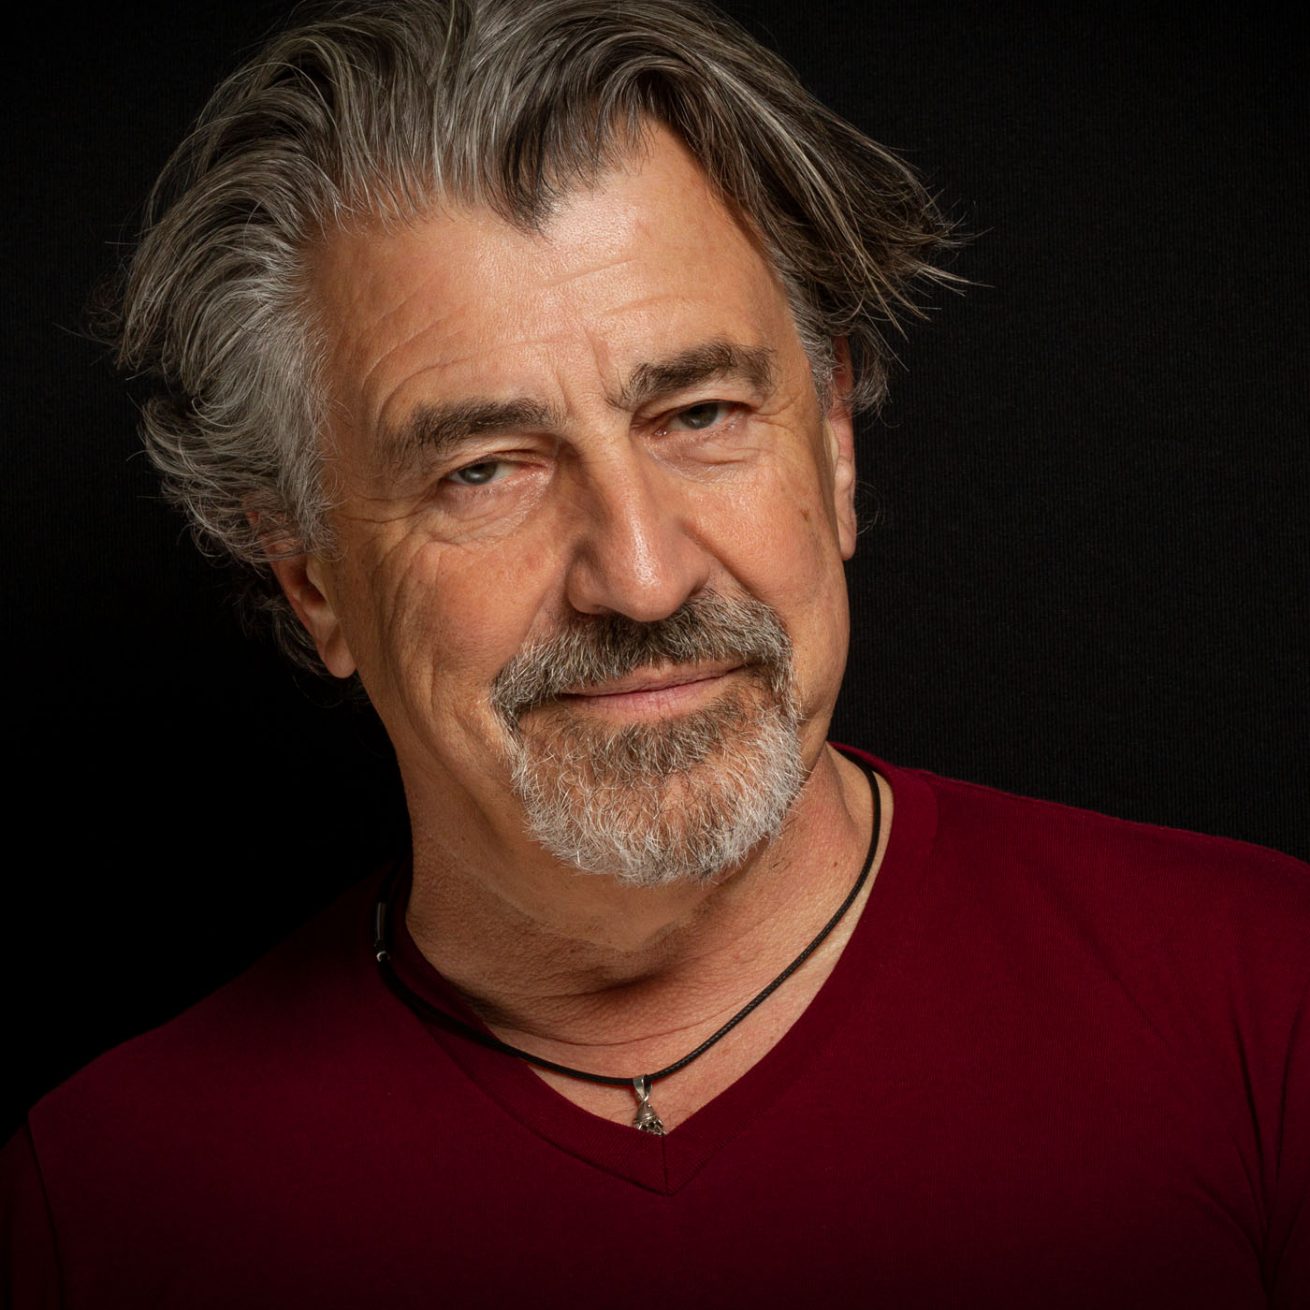
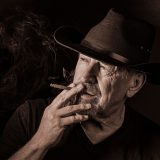
Butterfly lighting - a.k.a. Paramount Lighting
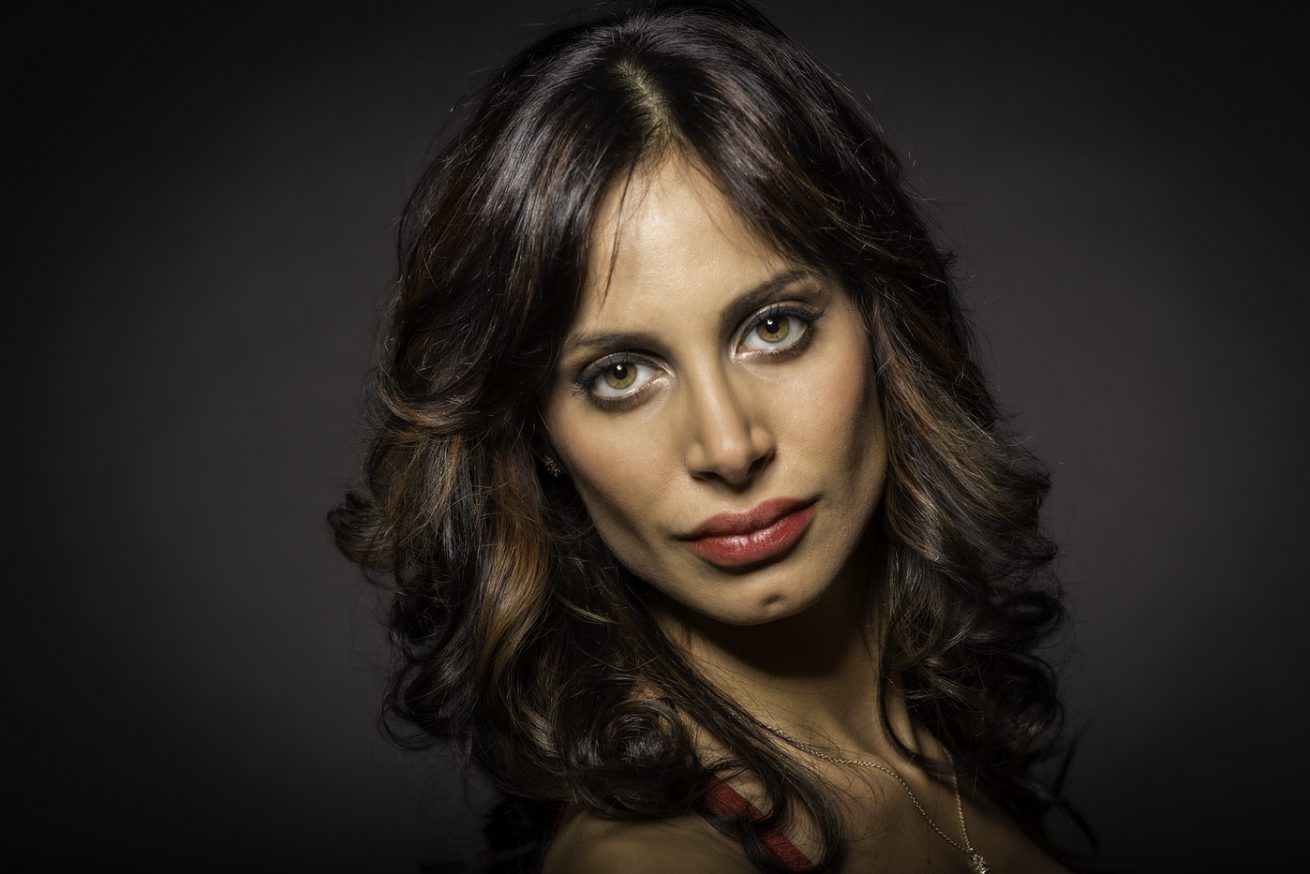
This style of lighting was made popular by Paramount Studios photographer, George Hurrell during the 1930s and 40s. This is one of the classic lighting styles and creates a timeless look from the glamour days of Hollywood. You can check out Hurrell's work with the greatest stars of his era. The internet is full of images of the likes of Humphrey Bogart, Marlene Dietrich, Errol Flynn and many more. Hurrell's images are usually monochrome with very soft, flawless skin, even for male portraits. He also used deep contrast and dark backgrounds to add to the drama.
The more modern name of Butterfly Lighting comes from the shape of the shadow cast under the subject's nose. The light is positioned fairly central, above the subject's face. As the height and distance in front of the face are adjusted the classic butterfly shadow is formed. The addition of a reflector below the chin is used to soften the otherwise harsh shadows.
In the images below I have included a flat light image, equivalent to using an on-camera flash, to show how improved things become once the light source moves away from the camera.
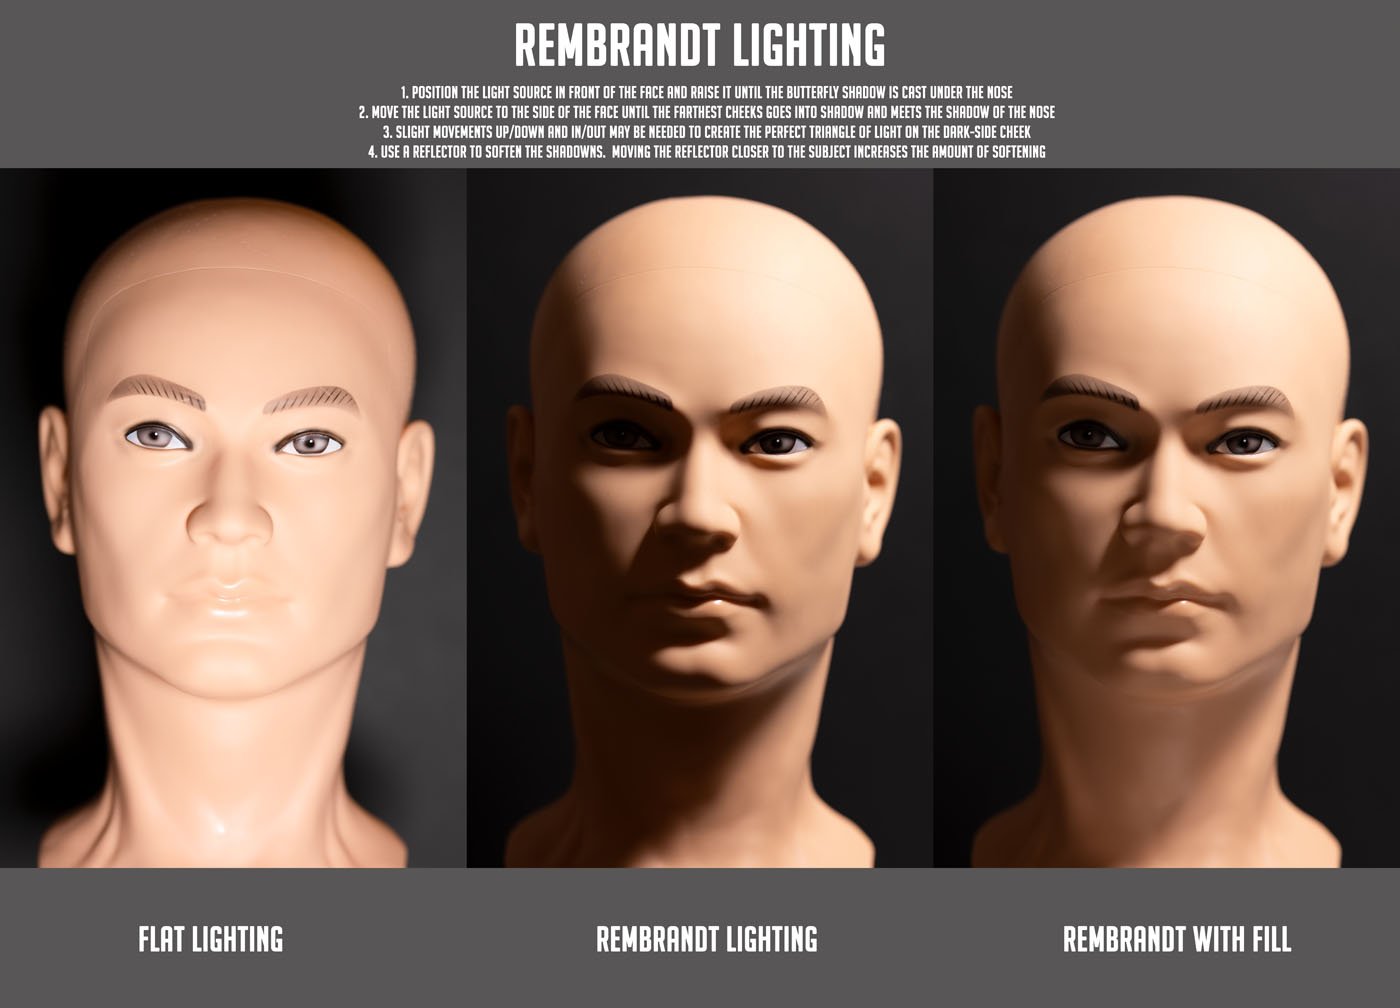
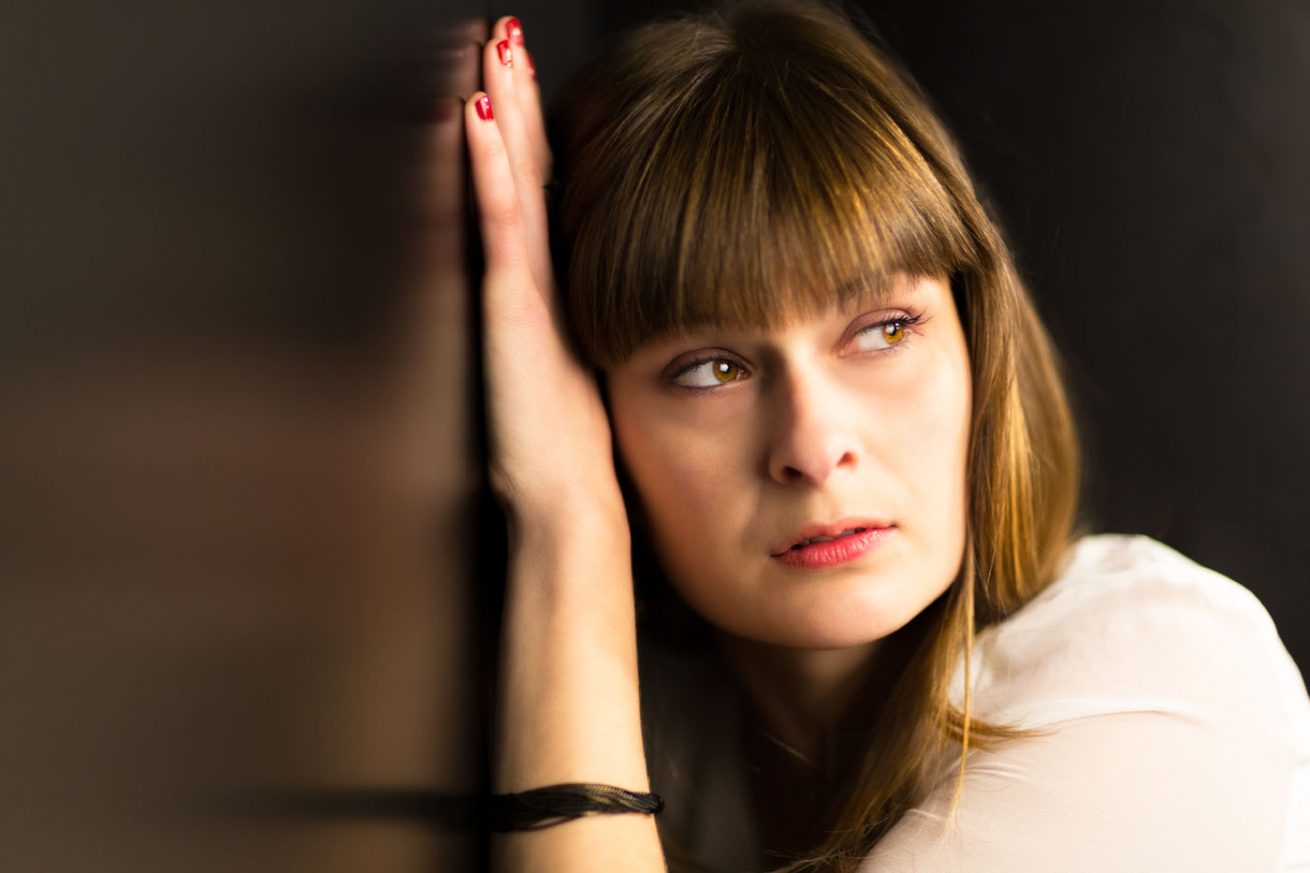
Rembrandt Lighting
This is the other classic setup. The name is taken from the style of lighting seen in the artist's portraits. In the 17th Century, studio lighting was in short supply so the Dutch Masters had to make do with window light instead. A quick web search of Rembrandt paintings will show that many of his portrait subjects were positioned side on to a window at an angle that cast the iconic triangle of light onto the shade side cheek
Rembrandt lighting is based on a light source to one side of the subject's face that also casts a triangular highlight onto the shadow side of the face. As with Butterfly lighting, the intensity of the shadows is controlled by means of a reflector. When not using studio lights this style is can be easily achieved using window light where the subject sits side on to the window set back slightly from the opening.
A simple way to achieve a Rembrandt light is to start with butterfly lighting and move the light around to the side of the subject's face until the desired light pattern is roughly achieved then fine-tune the height and distance from the subject to refine the lighting pattern.
Because of the association with Dutch Masters paintings, this lighting style works really well with muted colour palettes and grainy textures. This opens up a whole world of post-production fun.
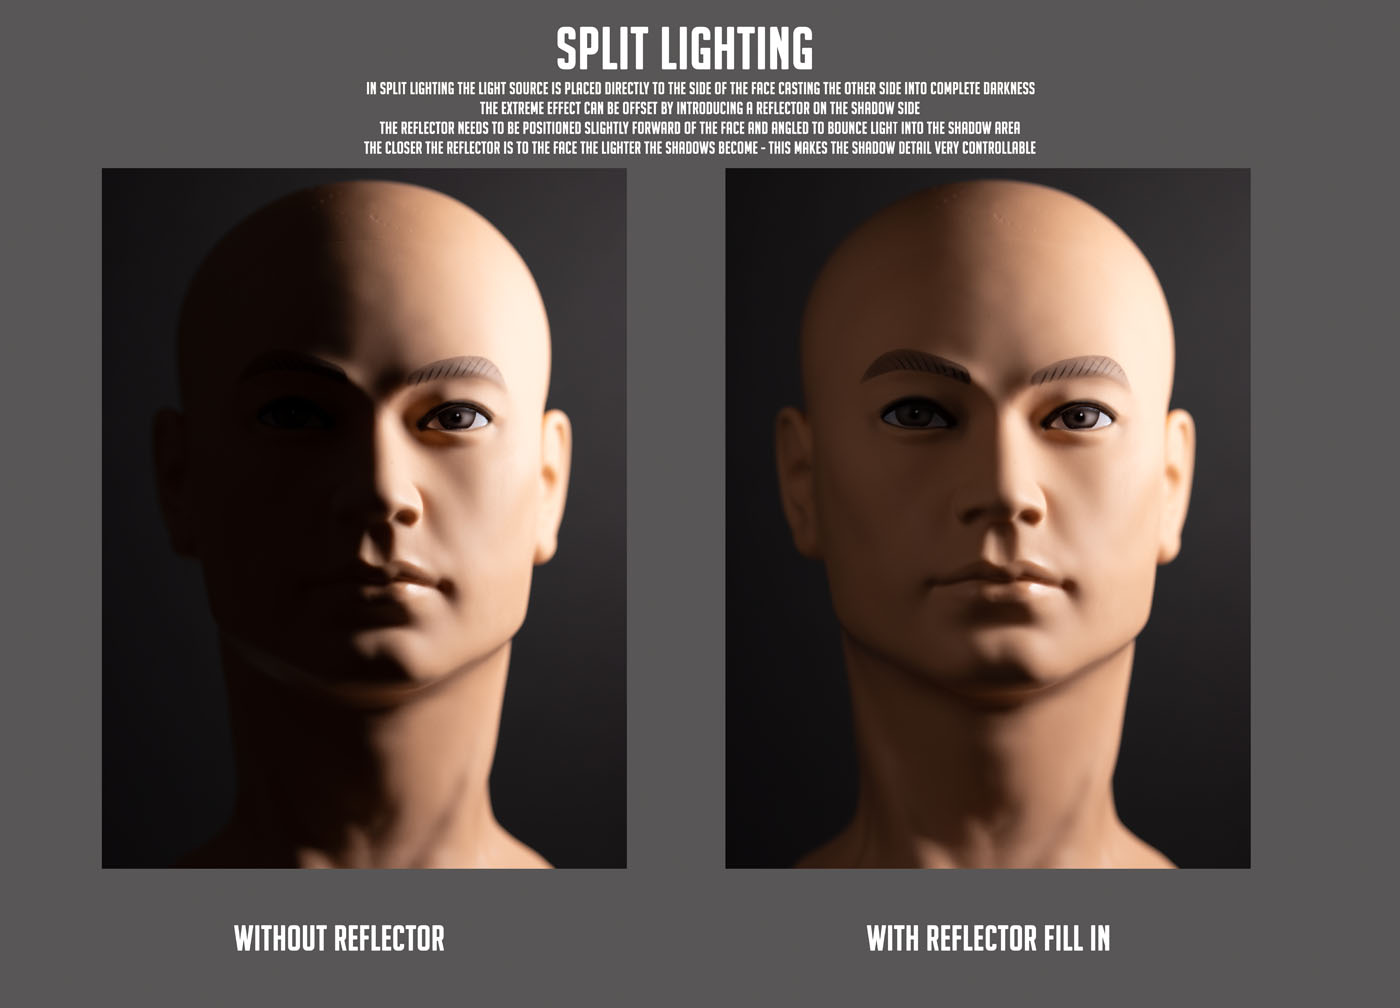
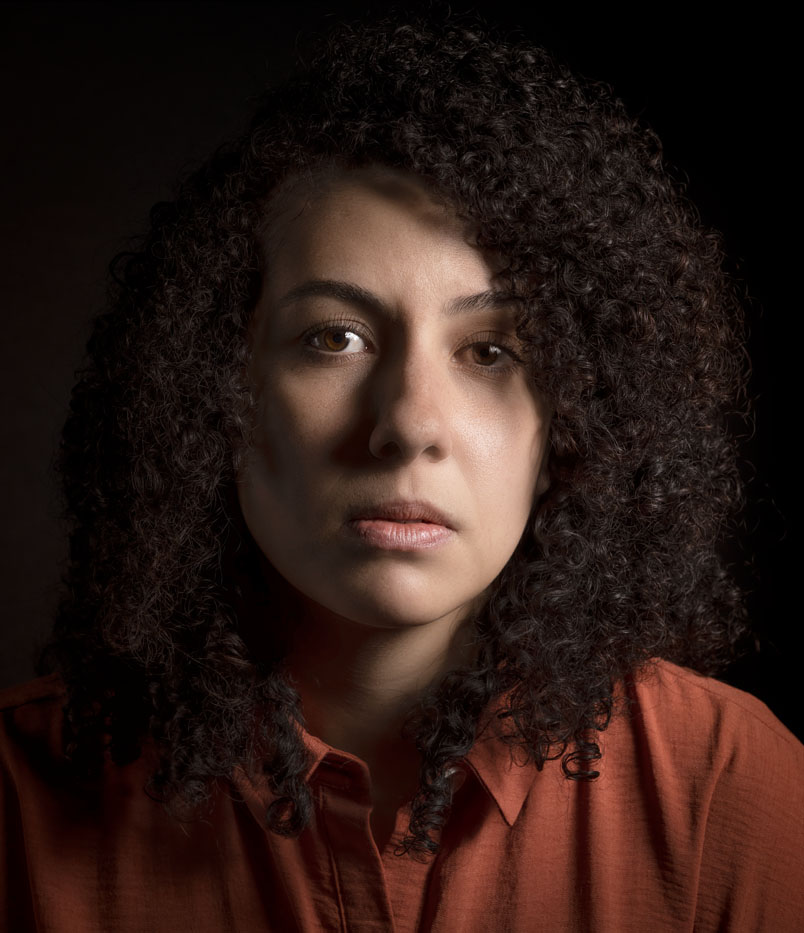
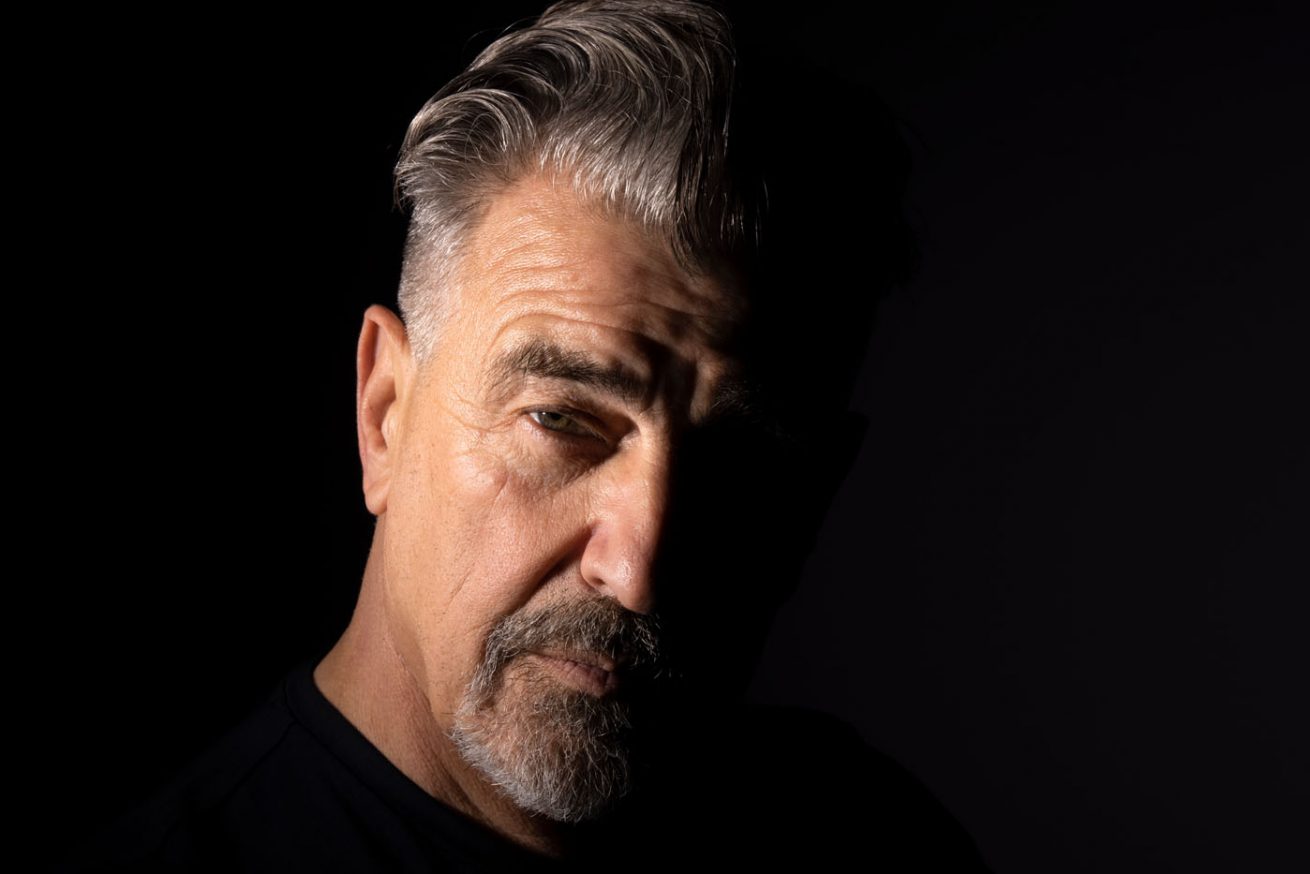
Split Lighting
Split lighting is created by placing a single light source to one side of the face. This creates a very stark, half-model, look. This is a bit of a Marmite style as some people hate it while others love it. Personally, I love this style and like to dabble with dramatic self-portraits using smoke and props when I'm short of a model.
Once again, if the shadows are too deep you can use a reflector to bounce some light onto the dark side of the face. This may require the reflector to be positioned a little forward of the face and angled onto the shadow side
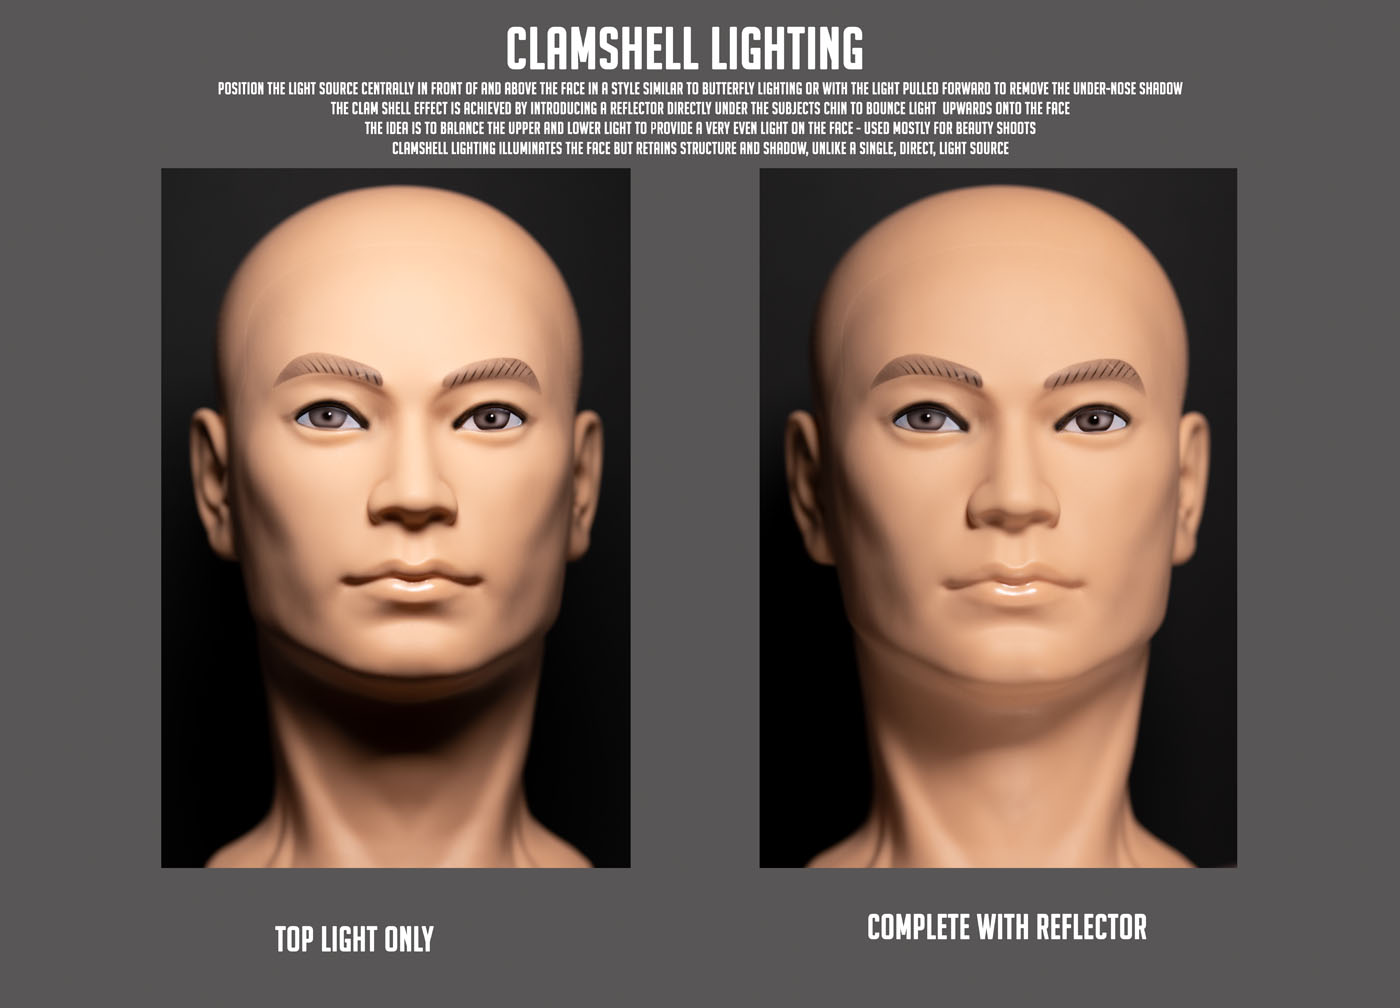
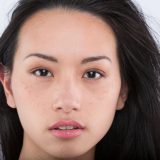
Clamshell Lighting
Clamshell lighting takes its name from the arrangement of the lights. With one light source illuminating the subject from above and a second light source, usually a reflector lighting the subject from below, both arranged in the shape of an open clamshell with the camera peeking between them. This format is usually used for feminine beauty shoots as it softens the skin and causes it to glow. The face is uniformly lit but retains structure and minimal shadowing. A quick internet search for clamshell lighting images will reveal that in 90% of the cases the subject is female and fairly youthful. The implication being that your model needs to look pretty good to start with or the flaws will quickly become apparent.
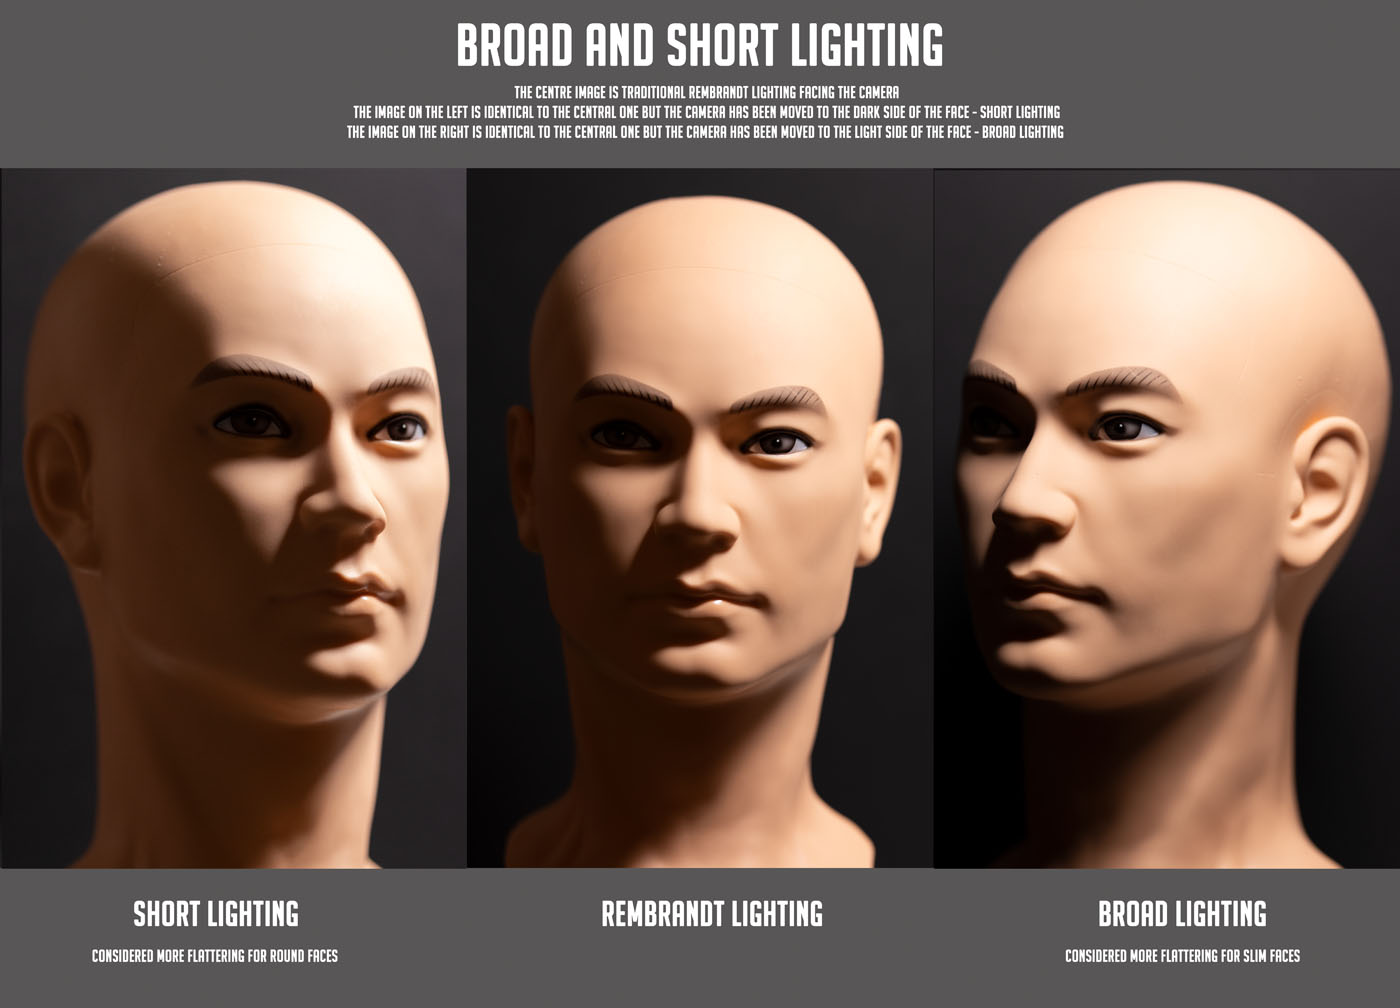
Short and Broad Lighting
Let's take a brief break from lighting setups and move the camera instead. Short and broad lighting refers to the placement of the camera in relation to the most illuminated side of the face. Therefore, this description applies to any style of lighting where one side of the subject's face is brighter than the other. In the example below I have composed a headshot using a standard Rembrandt lighting setup. If we move the camera around the subject so that the dark side of the face is nearer the camera you are using Short lighting. This look gives a more flattering perspective to a model with a broader face by minimising the areas of brightness. Conversely, if we move the camera to the side receiving the greatest amount of light we are using Broad lighting. This tends to make the face look more full and provide a more flattering look for models with a slender face.
Under Lighting
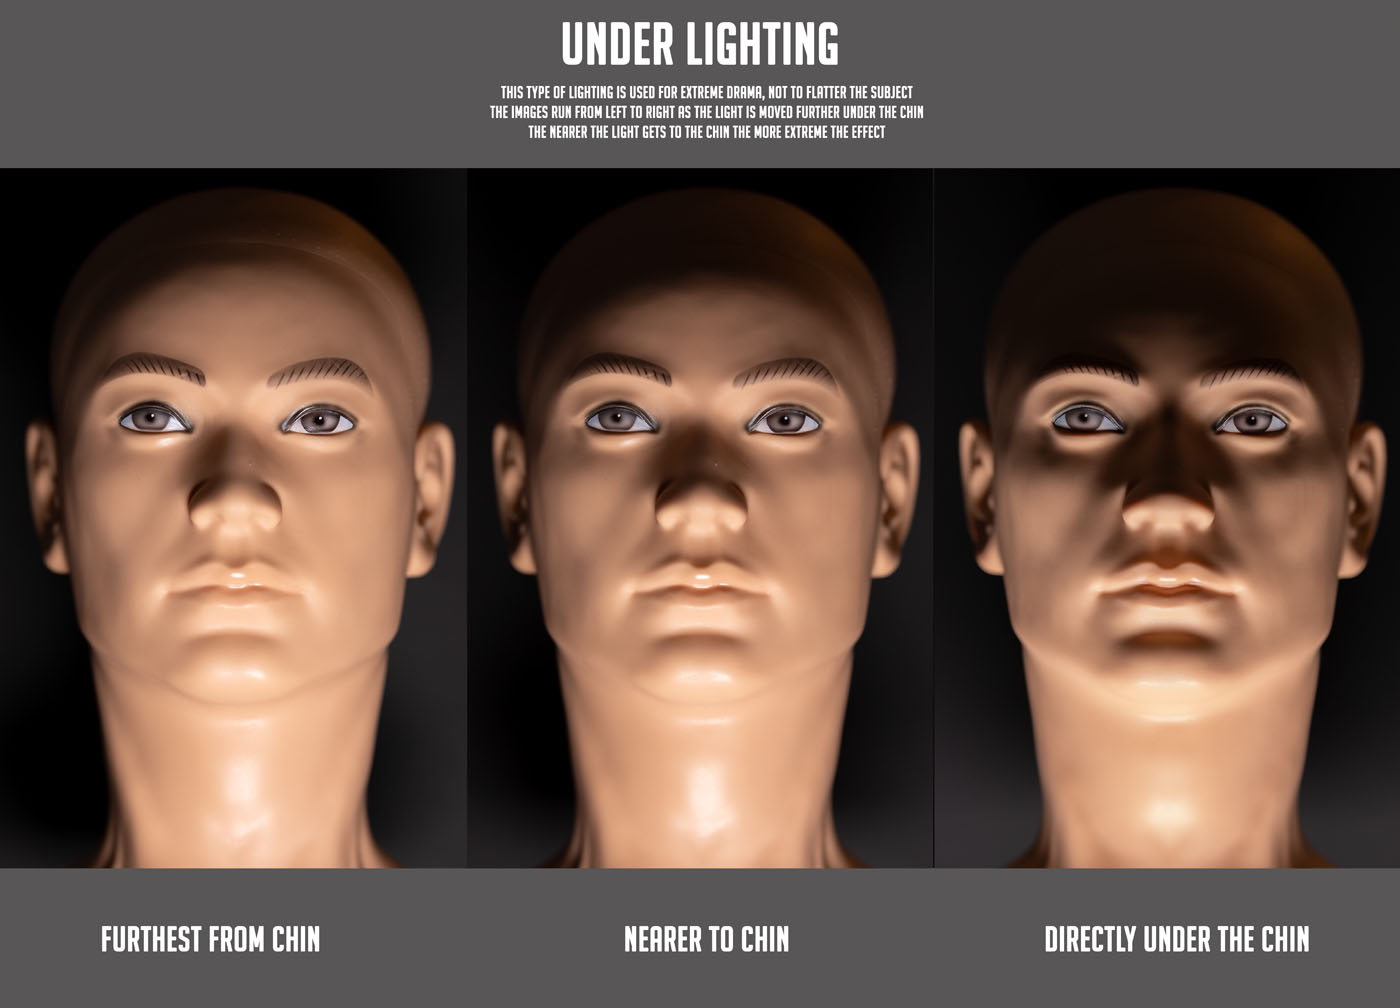
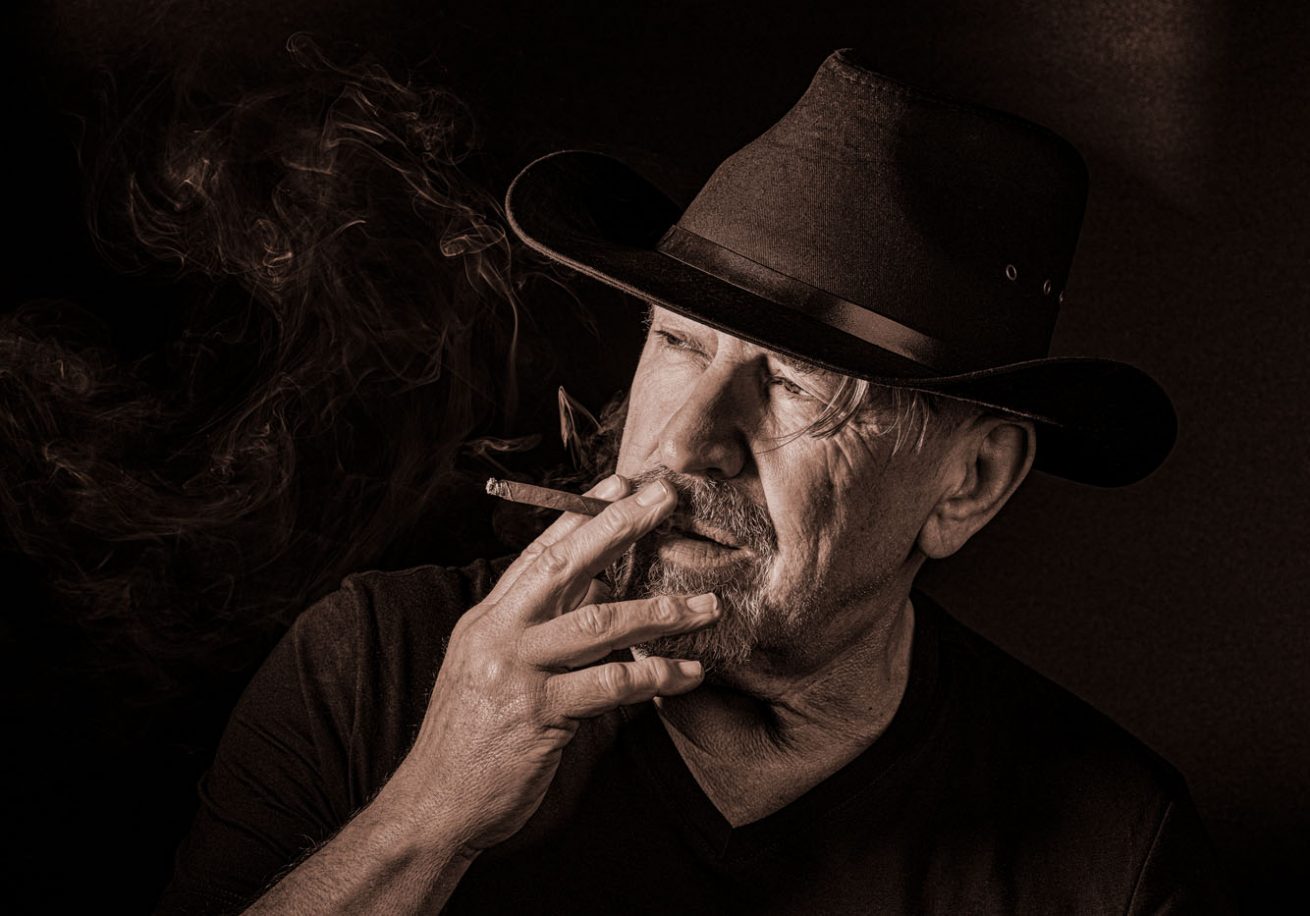
Let's finish with the ugly child of the family, under-lighting. This is rarely used unless you are trying to create the look of a horror movie. It's similar to the look you created as a child to scare your friends by shining a torch onto your face from beneath your chin. This isn't really useful but it can be fun in the right situation. The nearer the light source gets to the chin the scarier it looks. With a lower-powered light this setup can be used to replicate candlelight for a composite image.


Leave a reply
You must be logged in to post a comment.