When do you need to focus stack and what exactly does it mean?
In order to set the scene, I will need to teach granny to sucks eggs with a little recap regarding the depth of field in your images. For those that already understand this, you can skip forward a little. Otherwise, sit back and enjoy the ride.
Any image you shoot will have an associated depth of field. When you focus on a point in the image, the depth of field is the distance in front and behind the point of focus that is still sharp.
The size of the depth of field depends on three primary factors:
-
-
- Aperture
- Focal Length
- Distance from the point of focus
-
Sensor size also plays a part but is of less importance to our discussion.
There are many depth-of-field calculators available online, or as smartphone apps. It’s an interesting experiment to try out some random settings and see what happens to the depth of field as you vary each parameter. You don’t even need your camera to do this, as it is a purely virtual experiment.
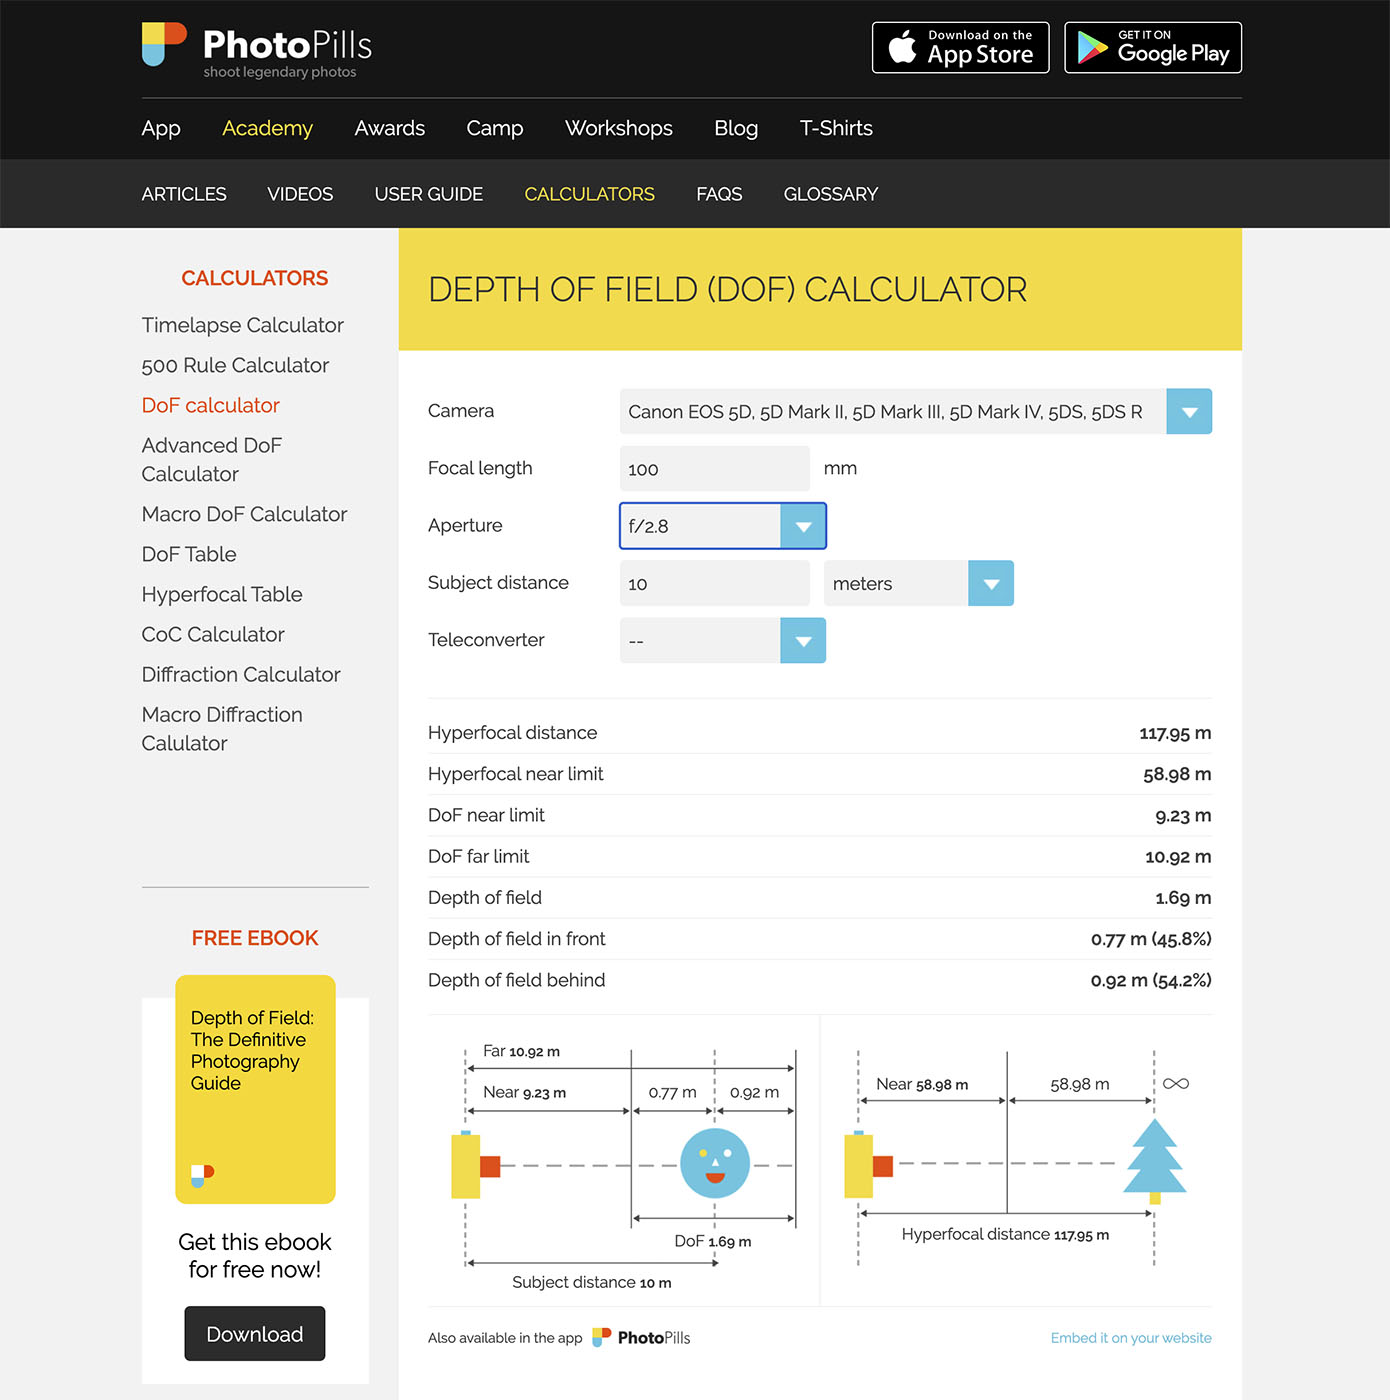
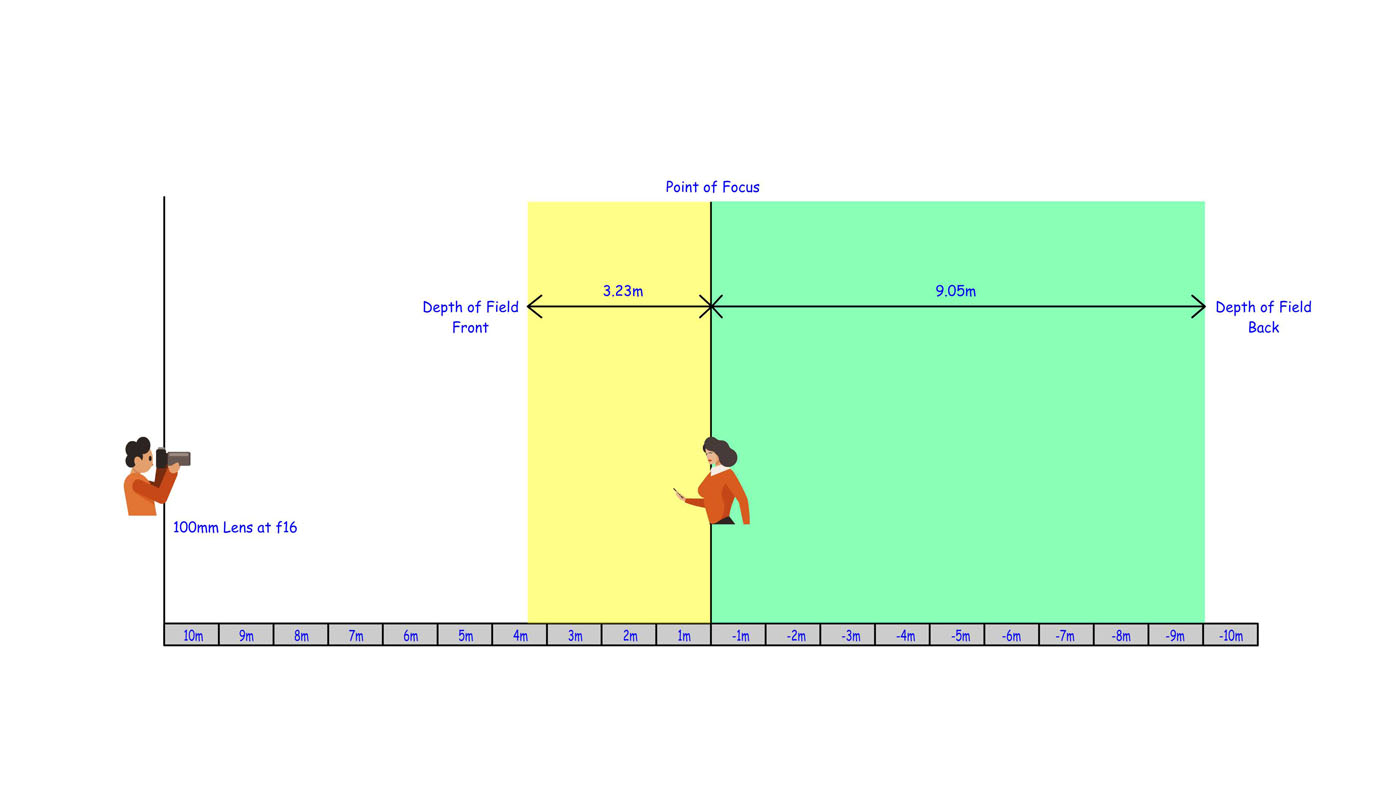
Let’s take as an example a 100mm lens on a full-frame camera.
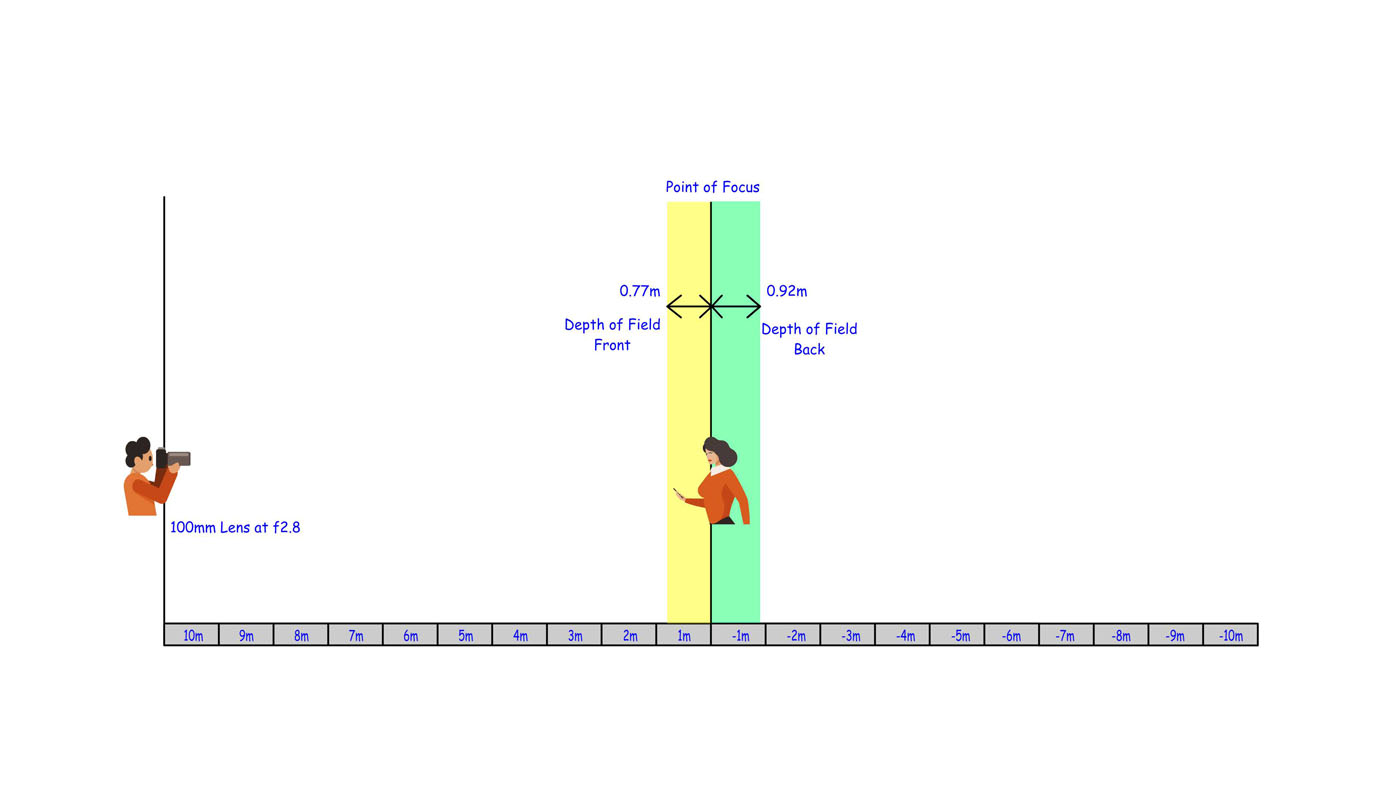
If we are standing 10m from our subject with an aperture of f16, then the depth of focus will be 12.28m (3.23m in front of the point of focus and 9.05m behind). Switching to an aperture of f2.8 the depth of focus reduces to 1.69m (0.77m in front and 0.92. behind.
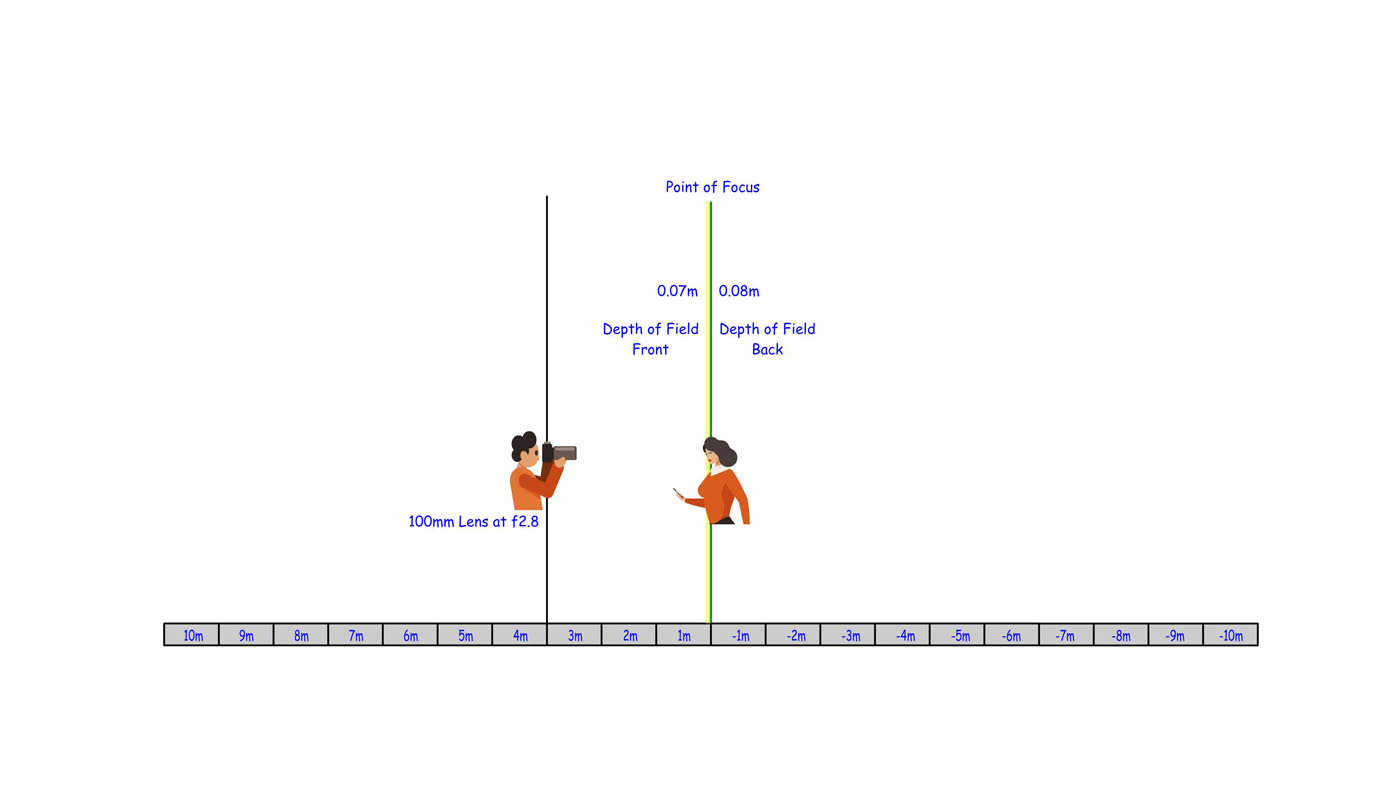
If we were to move to 3m from our subject, staying with f2.8, then our depth of focus drops to just 0.15m (0.07 in front and 0.08 behind) less than the depth of a person’s head.
Switching to a 50mm lens but staying at 3m and f2.8, our depth of field changes again. This time the depth of focus jumps up significantly, to 0.6m (0.27m in front and 0.33m behind.
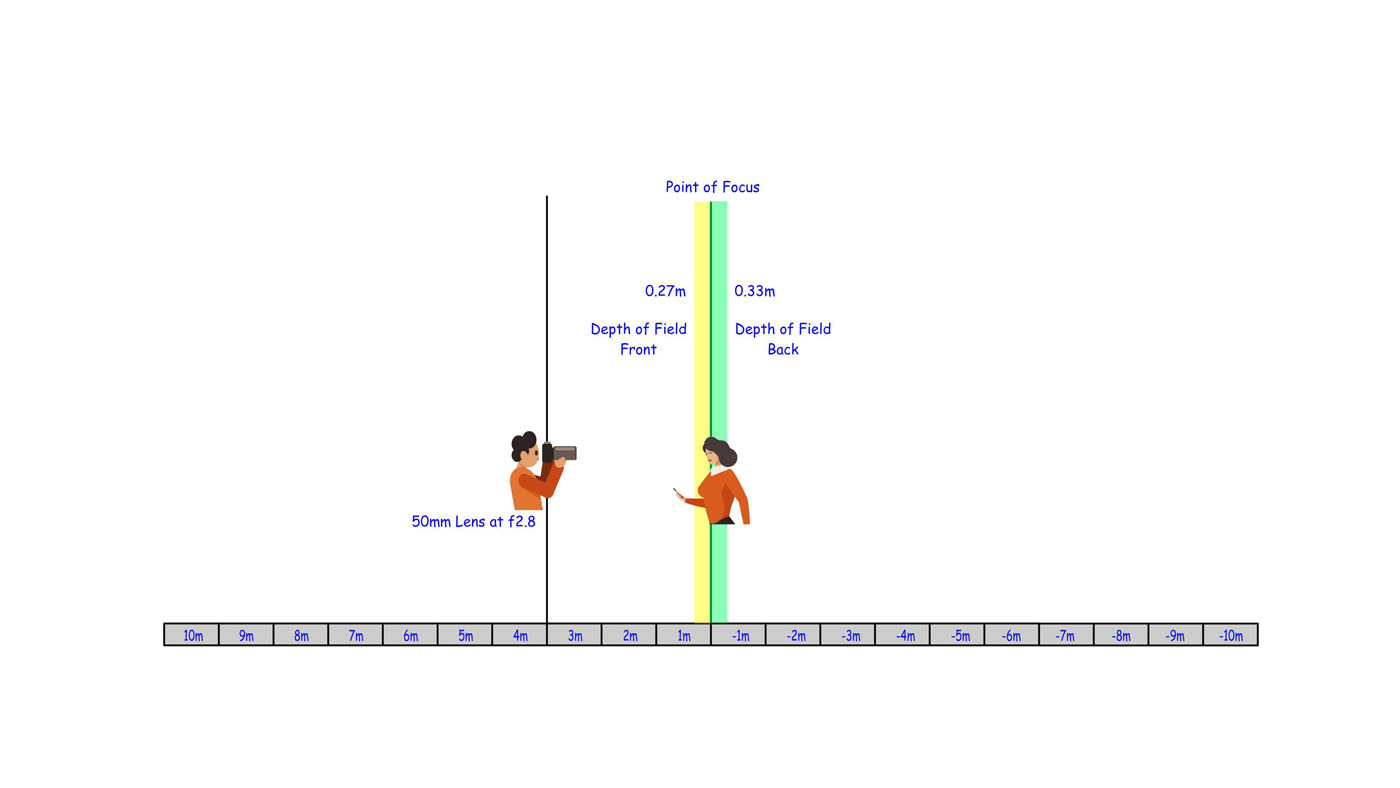
With a large aperture and a longer lens, the depth of focus is shallow; with a small aperture and a wider lens, it becomes much larger. Portrait photographers tend to use a large aperture to focus on their subject’s eyes, and by staying reasonably close to their subject, they can blur out as much of the foreground and background as they wish. Landscape photographers use a small aperture and wider lenses to obtain front-to-back focus. In either of those situations, choosing a suitable aperture and lens length will result in the image you’re trying to achieve. No focus stacking required so far.
However, for the sake of discussion, let’s consider taking a landscape shot in low light. Not a problem if you have a tripod; you can have that small aperture and the associated long shutter speed necessary to get the correct exposure. If you don’t have a tripod, things become a little trickier. You will need to choose an aperture and ISO setting that will give us a shutter speed at which we can handhold and still get a sharp image. Now we can take a series of shots, centered on the same point, at different focal distances, so that in each image a different portion of the scene sits within the depth of focus. Make sure to shoot in manual mode or the exposure may fluctuate across your images. Judgment and practice will teach you how many images will, collectively, give you front to back focus for the whole scene. This is a simple situation where focus stacking is our friend.
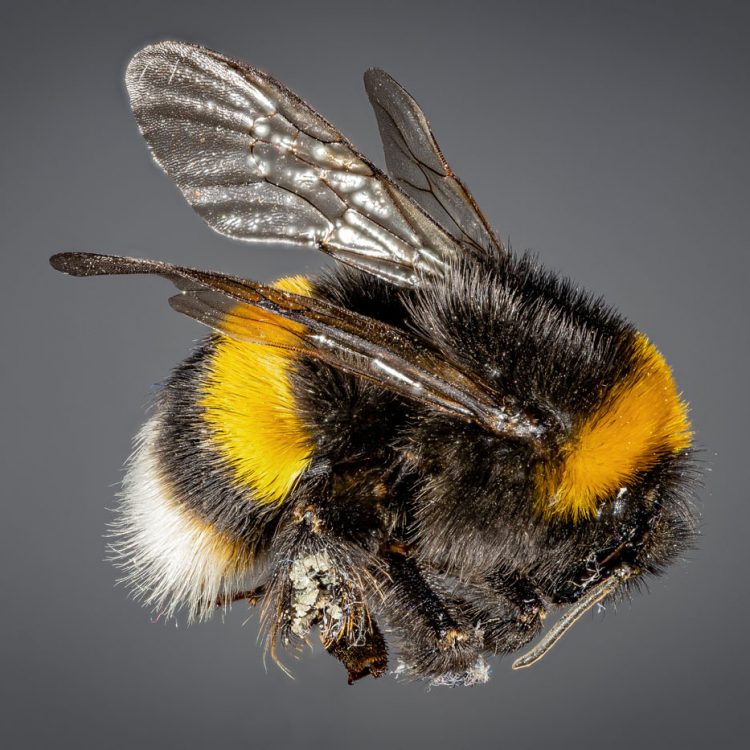
However, focus stacking really comes into its own for macro photography, where the closeness of the subject is very much reduced and even with a very small aperture, the depth of field can be tiny. Let’s briefly return to our depth of field calculator……
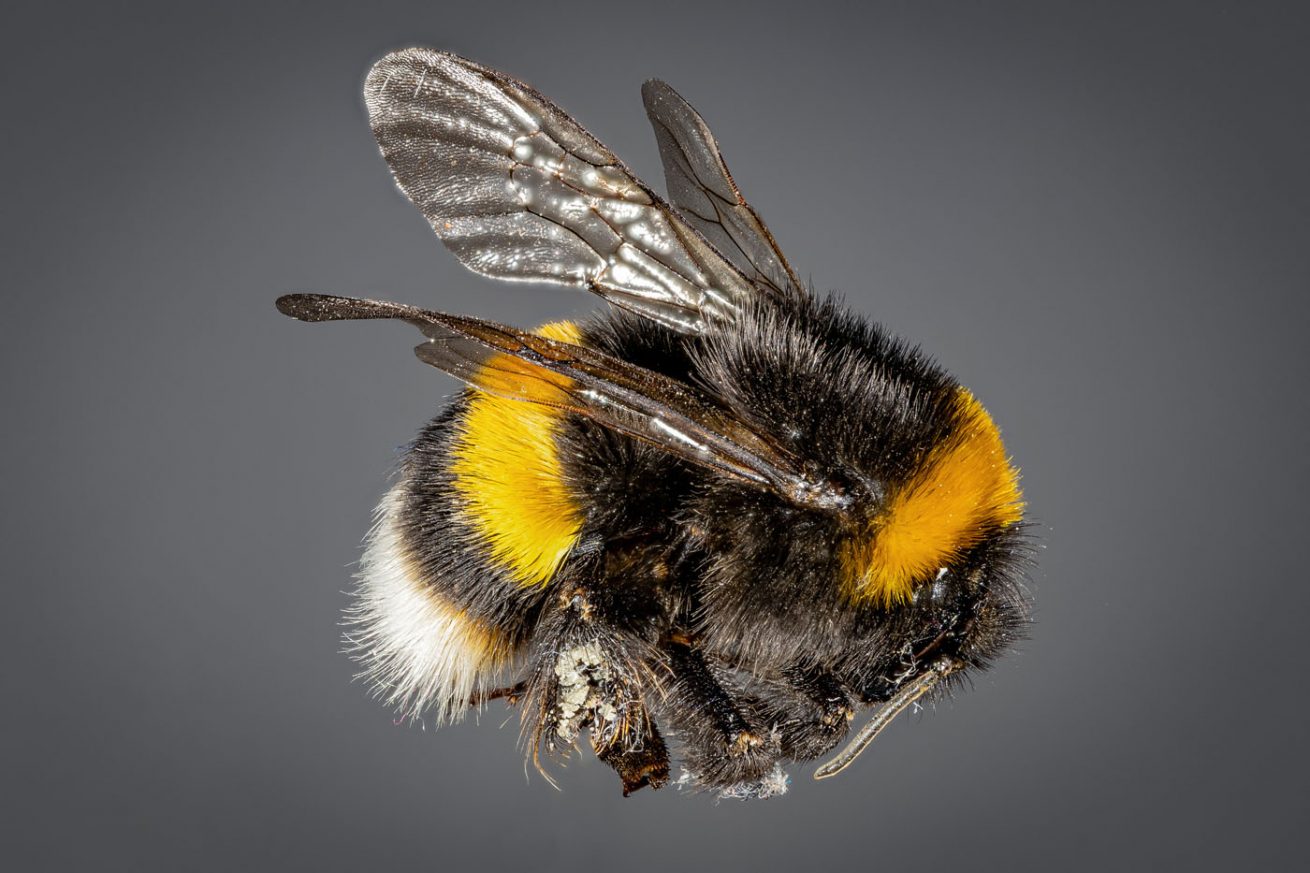
With a 100mm macro lens at a distance of 150mm and an aperture of f16, the depth of focus is just 0.7mm. You would need at least 30 images to capture the full length of a bumblebee.
When you start using extension tubes, or lenses capable of magnifications greater the 1:1, you may need dozens of images to capture the whole of your subject clearly. The methods for capturing these images will be covered later on.
This guide is not intended as a software tutorial; that can be the subject of another lesson. However, be aware that software packages, such as Photoshop and Affinity Photo, have inbuilt focus stacking capabilities. Furthermore, there are several dedicated focus stacking packages available in the marketplace. Price, quality, ease of use, and output quality vary a great deal across the options that are out there. The good news is that most software packages offer a free trial period so you can quickly settle on the one that meets your needs and budget.
Whichever tool you use, the method is exactly the same. The software will align your images into a stack and analyse each in turn. The best in-focus portions of each image are then selected and merged into a single “Stacked” output image. A rule of thumb is that you can never have too many images. The more range you have, the better chance you have of getting a superbly sharp final output. If you have too few images, there may be gaps in the depth of field where none of your shots are in focus and the software will “make do” with the best available. This can result in slightly fuzzy areas in the image.
One thing is for sure: when you get it right the results can be spectacular.
Macro Photography
By definition, macro photography occurs when the size of the subject being photographed is replicated on the camera sensor at its actual size or greater magnification. This is not the same as simple “Close-up” photography. This means that at 1:1 on a full-frame camera, the largest subject you can photograph must be less than 36mm x 24mm. As a result, macro lenses are required to get very close to the subject being photographed.
As an example, the Canon 100mm L f2.8 Macro lens has a minimum focusing distance of 300mm. Using our calculator from earlier, we discover that at f16 we have a depth of field of just under 6mm and at f2.8 half a millimetre. It becomes apparent that macro photography requires the use of very small apertures and/or focus stacking.
Macro Image Capture Techniques
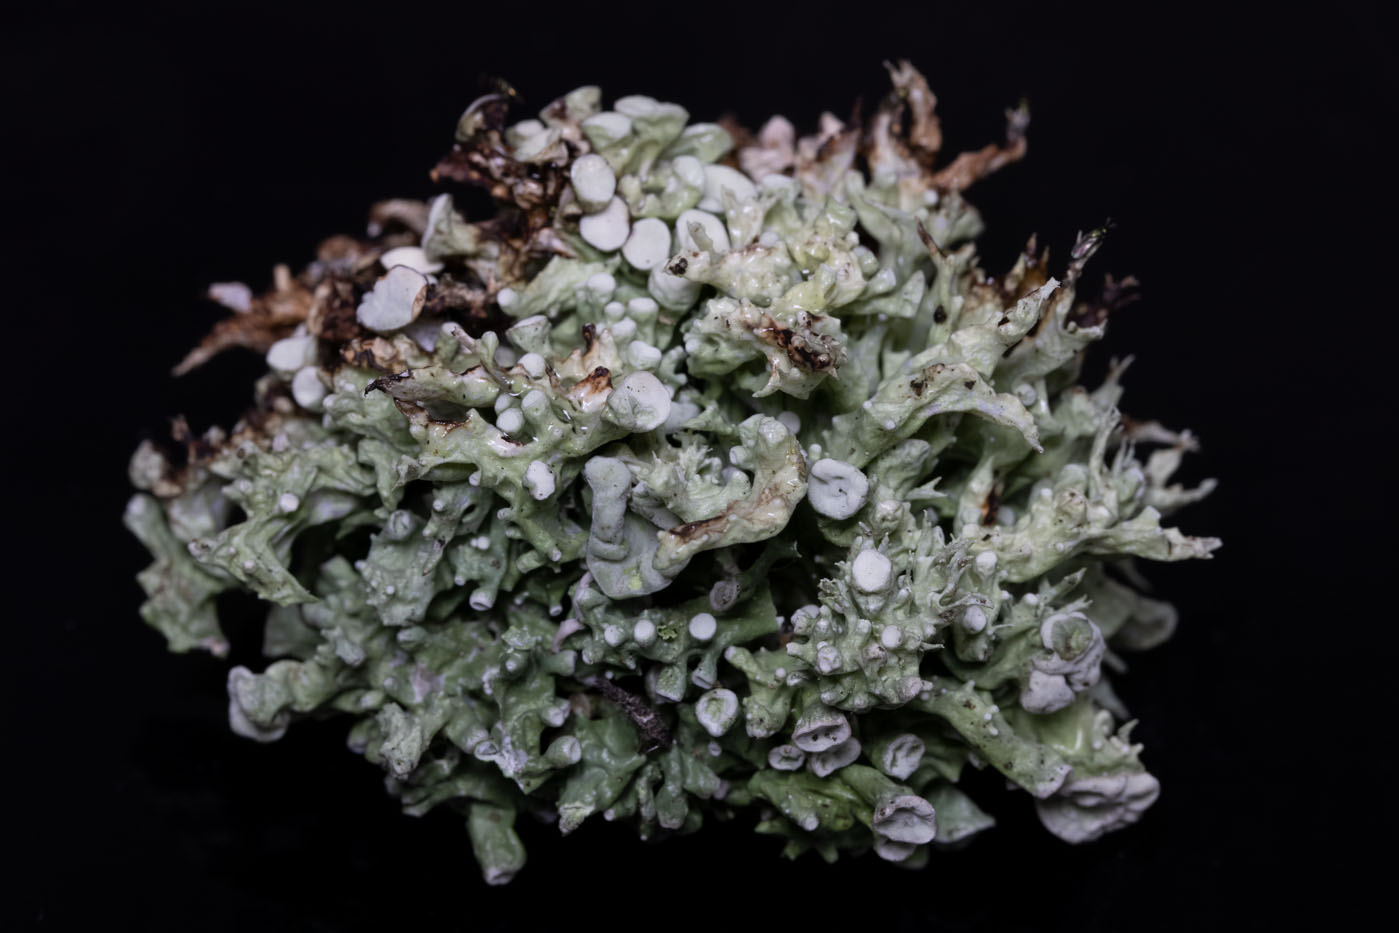
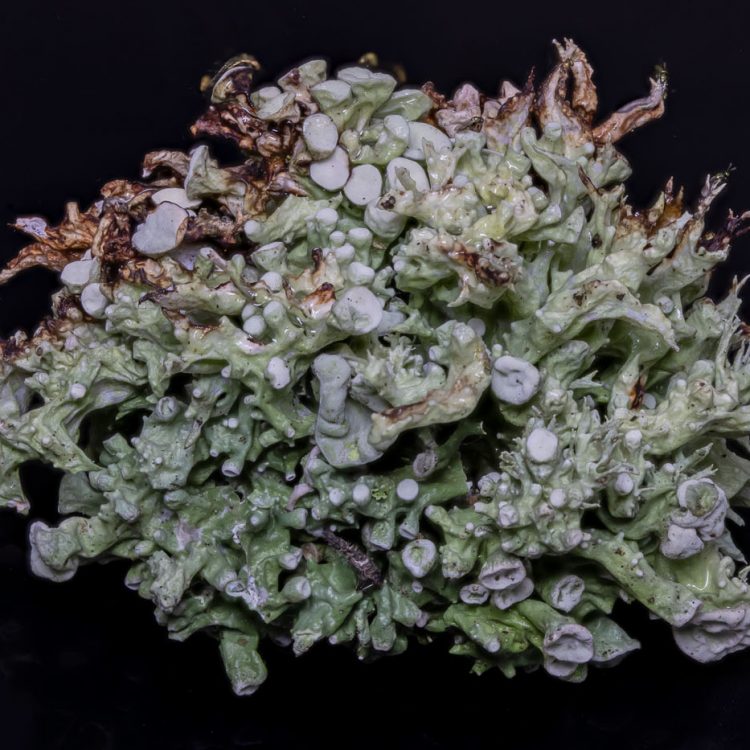
Handheld or Tripod?- Many photographers will shoot single image macro shots, and with enough light and a fairly small aperture these images can be perfectly acceptable. The image below left is a single-image macro shot of a small piece of lichen, taken with a 100mm macro lens at f11.0 and ISO100. This resulted in a shutter speed of 0.5 seconds, which would not be possible to handhold, so the camera was mounted on a tripod. Whilst this is a perfectly good image, you will note that only the front face of the lichen is actually in focus, with the depth of the subject rapidly blurring out. I could have handheld this shot by using an aperture around f2.0 to achieve a suitable shutter speed, but that would have significantly reduced the already-limited depth of focus. Alternatively, I could have raised the ISO to around 3200, which would maintain the current depth of focus but introduce a high level of image noise.
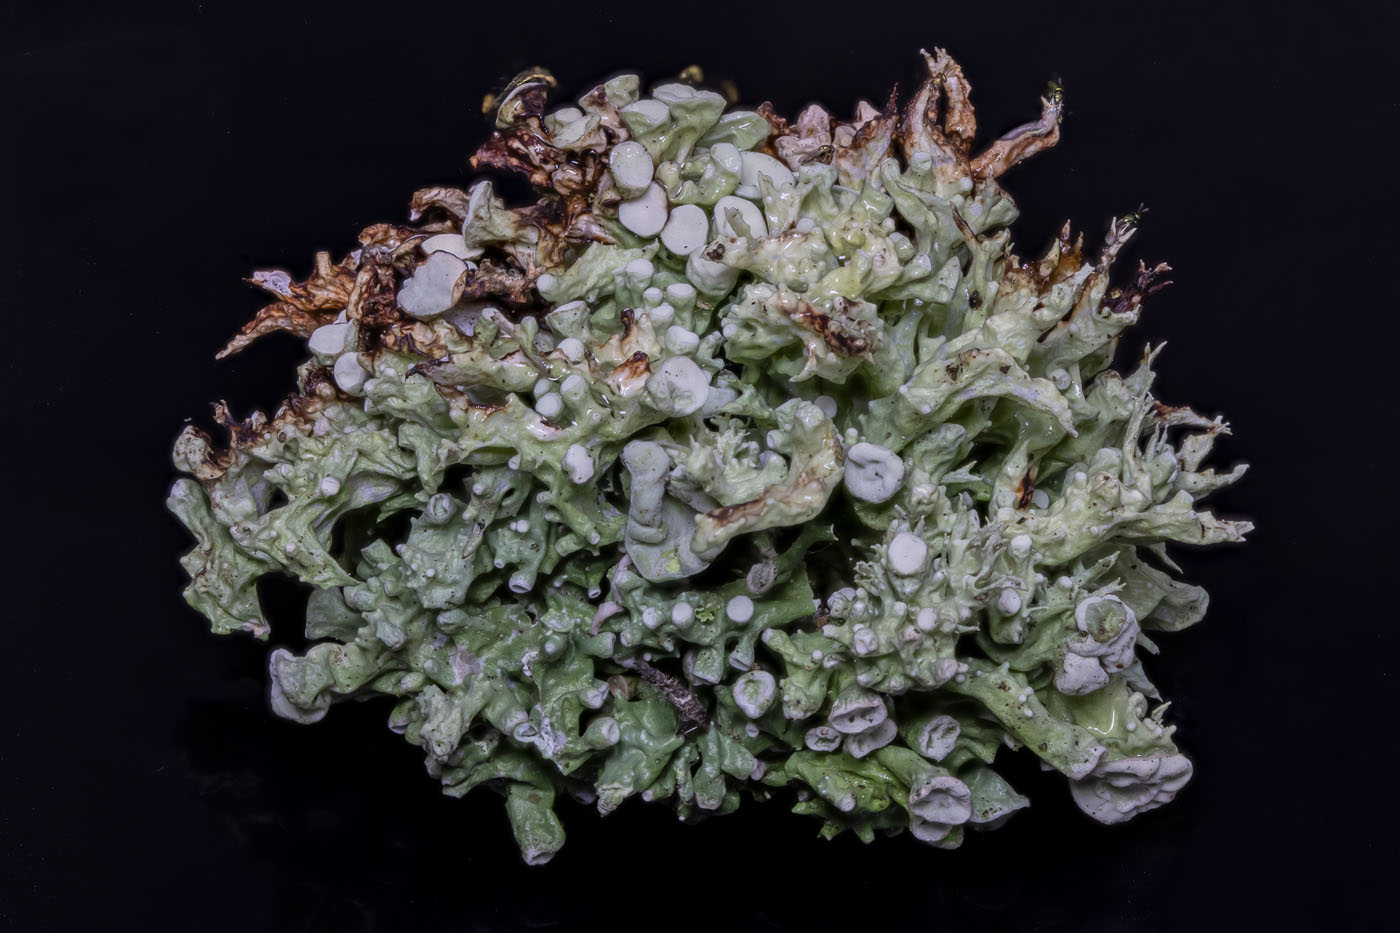
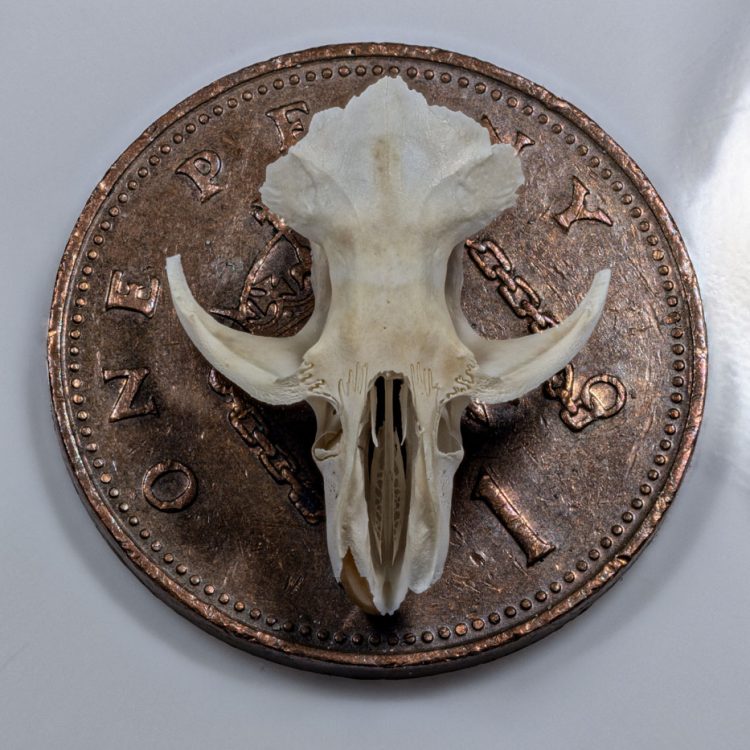
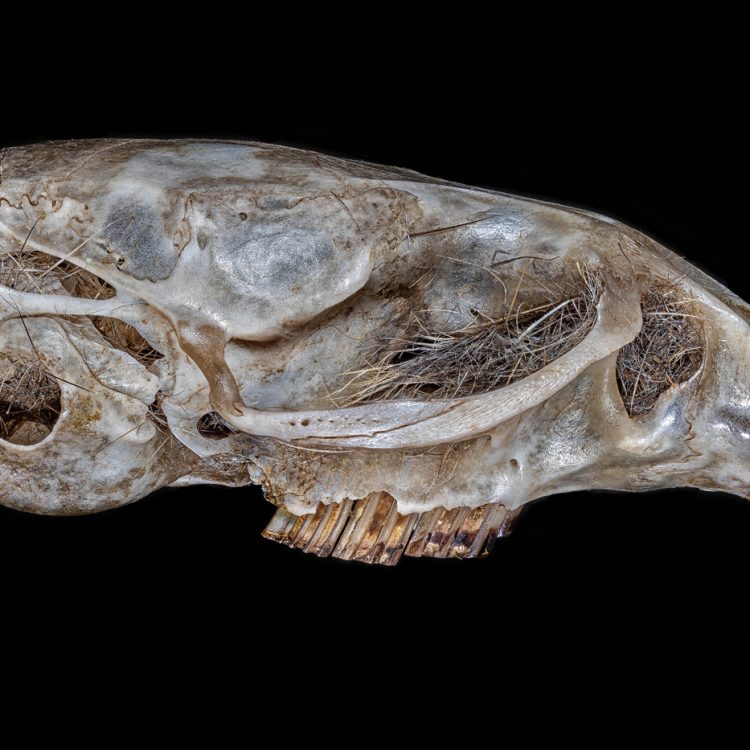
If you are handholding the camera it will be virtually impossible to focus stack. You need to capture accurately aligned images as well as smoothly transition the focal plane through the depth of the object being photographed. Because my camera was mounted on a tripod, I was able to shoot a sequence of 30 images, where the plane of focus moved incrementally through the subject. This set of images was then focus stacked, and the resulting shot can be seen on the right. There is a vast improvement in the level of detail in the second image and clearly shows the benefit of focus stacking this type of shot.
Focus Stack Image Capture Techniques
There are two basic techniques for generating a stack of images: using the camera lens focus wheel or using a focusing rail.
Manual Focus - The simplest method for capturing an image stack. With the camera mounted on a tripod, switch the lens to manual focus and, if available, use the camera's self-timer to minimise camera shake. Set the first focal point to the portion of the subject nearest to the camera and take a photograph. Now wind the focus wheel to move the focal plane further into the subject and take another shot. Repeat this process until the focal plane has reached the furthest point on the subject. If your camera has focus-peeking, it really helps to see which portion of the image is sharp at the selected settings. Without focus-peeking it is simply a question of trial and error to work out how many "slices" of the subject are needed to collect every detail. The more images you shoot and the finer the increments, the better the final stacked image will be.
Focus Rail - The other method is to use a focusing rail. This is a device that sits between the camera and tripod, allowing you to incrementally control the movement of the camera without the need to use the focus ring on the lens. The sequence is started in the same way - by focusing on the portion of the subject nearest to the camera and taking your first shot. The camera (along with the set focal distance) is then advanced using the dial on the focus rail. This method is no different from the previous one, but the rail gives a much more refined control of movement to the focal plane. Focus rails can cost up to several hundreds of pounds and can be controlled by a smartphone app to drive the steps between images. Most commonly, you only need a simple rail costing around £30.
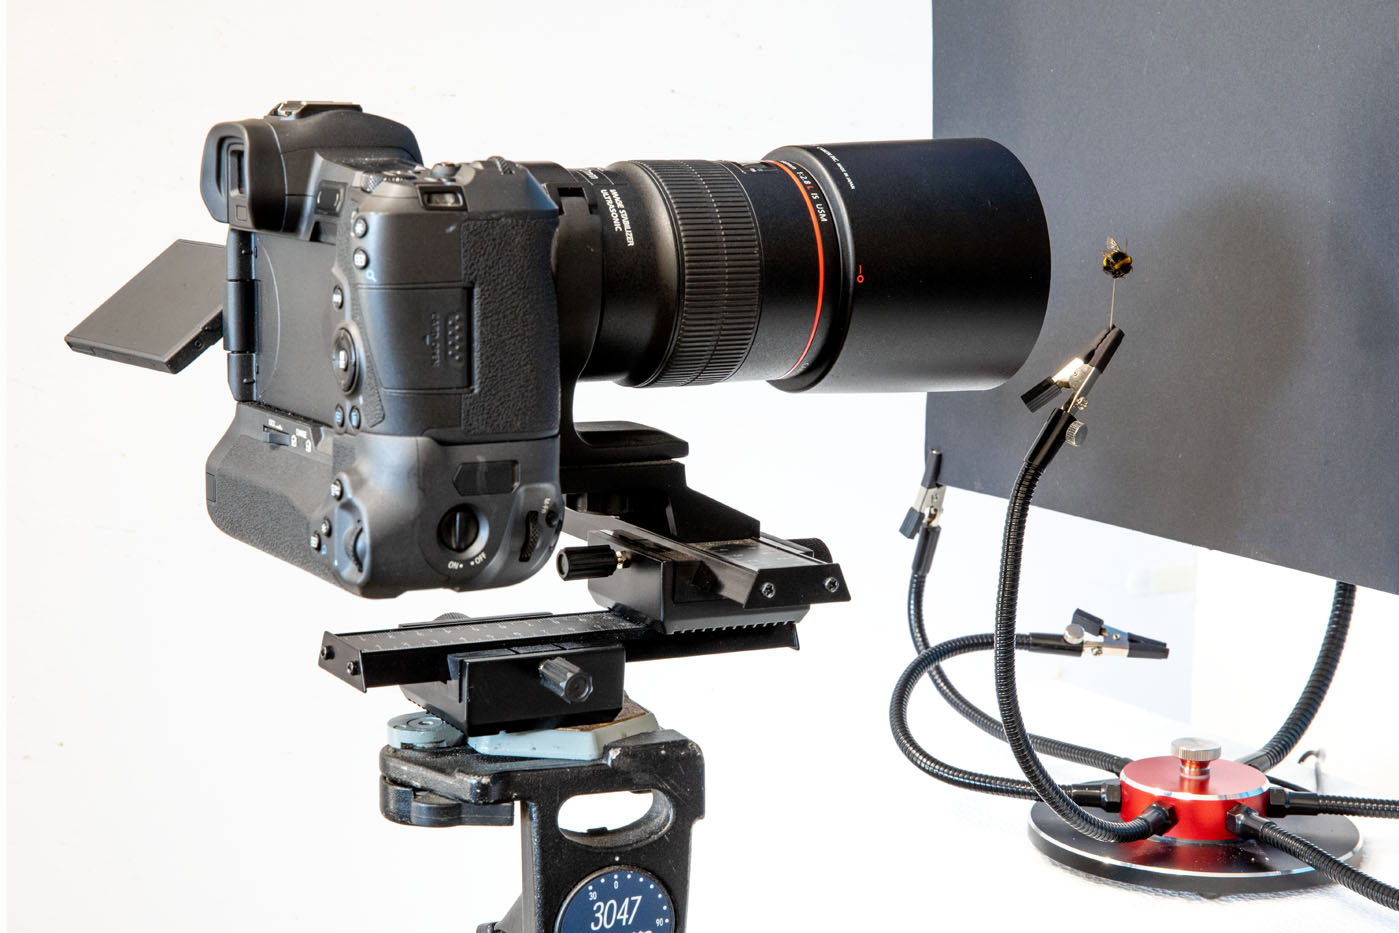
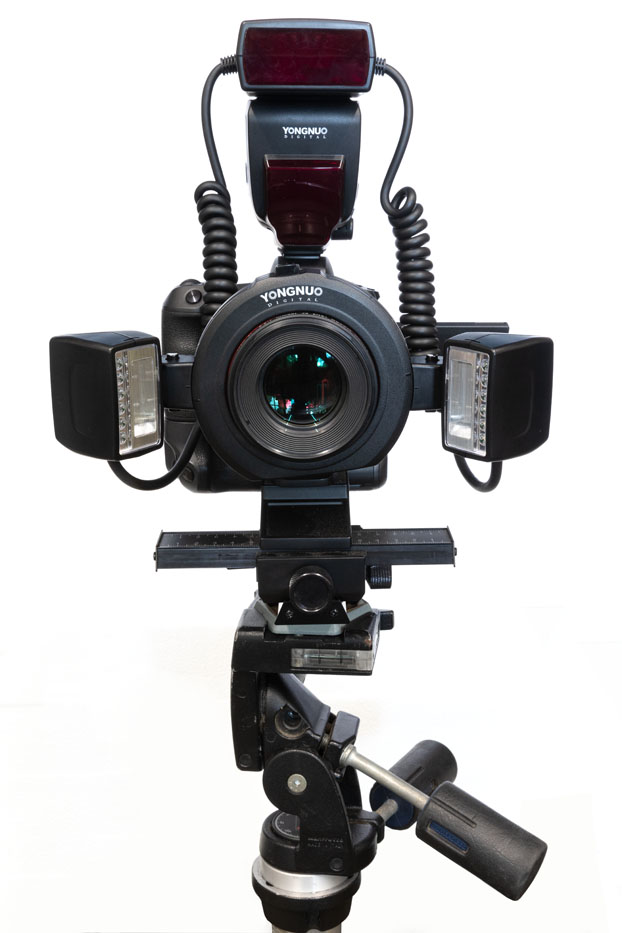
Because of the need for very small apertures, it is often advantageous to use a studio flash to illuminate the subject. Unfortunately, a flashgun mounted on the hot-shoe will, most likely, be positioned too high to illuminate the subject, so camera and equipment manufacturers have created dedicated macro flash systems. These usually take the form of a ring flash sitting around the lens or a twin head system where the lights straddle the lens and can be individually moved to best illuminate the subject. The images below show my macro setup, with and without the flash gun attached. You will see in the images that I also use a "Helping Hand" system to position the subject exactly where I need it. These can be picked up at a very reasonable price.
Using the Focus Rail
The video below shows the use of the focus rail and demonstrates the fine adjustment available when positioning the camera. The use of focus peeking can also be seen as the camera is positioned to shoot the first image. Anything tinted red is covered by the depth of focus, making it a simple task to drill down through the focal range of the subject.
Focus Stacking Workflow
In order to maintain the highest quality in my final image, I always shoot my stack as RAW files. Once I have a full set of images I will open a sample RAW image and carry out any desirable image correction, this could include sharpening, colour adjustments, and tonal manipulation. Once I have perfected that single image I will open all the images in the RAW editor and apply those changes to all the images in the stack so that they are all consistent.
Focus stacking takes a fair bit of computer power so it is best to export the RAW images as high-quality JPEGs, they can also be downsized at this point if the full size isn't required for the final output.
There are many focus stacking software packages available and they all work in pretty much the same way. You import the files, the software will then align the images and then automatically process and select the sharpest portions from each photograph and produce a final rendered image covering the entire subject.
Focus Stacking Software
As stated earlier, there are many software packages that will process your images. Some are better than others and some appear faster, but this can be very subjective and can also be dependent on the number of images being processed.
Here is a shortlist of some of the most popular Stacking Software packages, and the good news is that many of them offer a 30 free trial to see which works best for you.
-
-
- Photoshop
- Affinity Photo
- Zerene Stacker (30 Day Trial)
- Helicon Focus (30 Day Trial)
- Combine ZP (Free)
- Picolay (Free)
-
Having tried four of the above I have found Affinity Photo to be an excellent choice, which also includes most of the capabilities of Photoshop. I am an avid user of Photoshop but from my personal experience, I have found far more flaws in its focus stacks than in those rendered by Affinity. You may find things to be different as there are many variables to consider.

A very well explained and informative Tutorial Mike.
As are the other Tutorials on your excellent website – nicely developed.
Keep up the good work.
Peter